Manage Equipment
- In this article:
- Equipment Overview
- Add New Equipment
- Edit Existing Equipment
- Delete Equipment
Equipment List Overview
The Equipment List provides easy access to all units added to the system. Users can search and filter the list, manage equipment by adding or editing details, and quickly generate new records for tasks like repair requests or work orders.

To access the equipment list, click on Equipment in the side menu.


Click the folder icon to view a list of locations and categories.

The side arrow to the right of the location name will reveal the category list.

Click on the name of a location or category to see the equipment that is stored within that specific location or category.

Click underneath the Equipment header to filter your equipment list based on Status or Location.

Utilize the search box on the top right to quickly locate any assets.

The down arrow attached to individual equipment will expand the selection and display tasks that are due.

The Actions button provides quick access to adding a new record for the unit, such as a repair request or work order.

Add New Equipment
To add new equipment, click the plus sign on the Equipment page.

The New Equipment screen contains a variety of information fields to complete.

The Unit #: Two pieces of equipment are not allowed to have the same unit #.
Serial #: Entering in the serial number will automatically populate the Year, Make, and Model of the equipment. No two units can have the same serial number.

Anything entered into the Keywords box will create a search tag for the equipment. These 'search tags' make it easier to find the equipment from a list. Entering keywords is optional and not required.
The check box for Equipment has a meter tells the system whether or not an odometer will be tracked. Each piece of equipment can have up to two meter types setup and be choosen from Miles, Kilometers or Hours. If this box is unchecked, the system will not track any meter readings.

Assignee: an employee who operates or is responsible for the unit's maintenance can be assigned.
Location/Category: which location the unit belongs to.
Purchase: category that is used for the depreciation report.
Maintenance Template and Inspection Template: Can be assigned to the unit.
- Find more information by clicking on Maintenance Templates or Inspection Templates.
Edit Existing Equipment
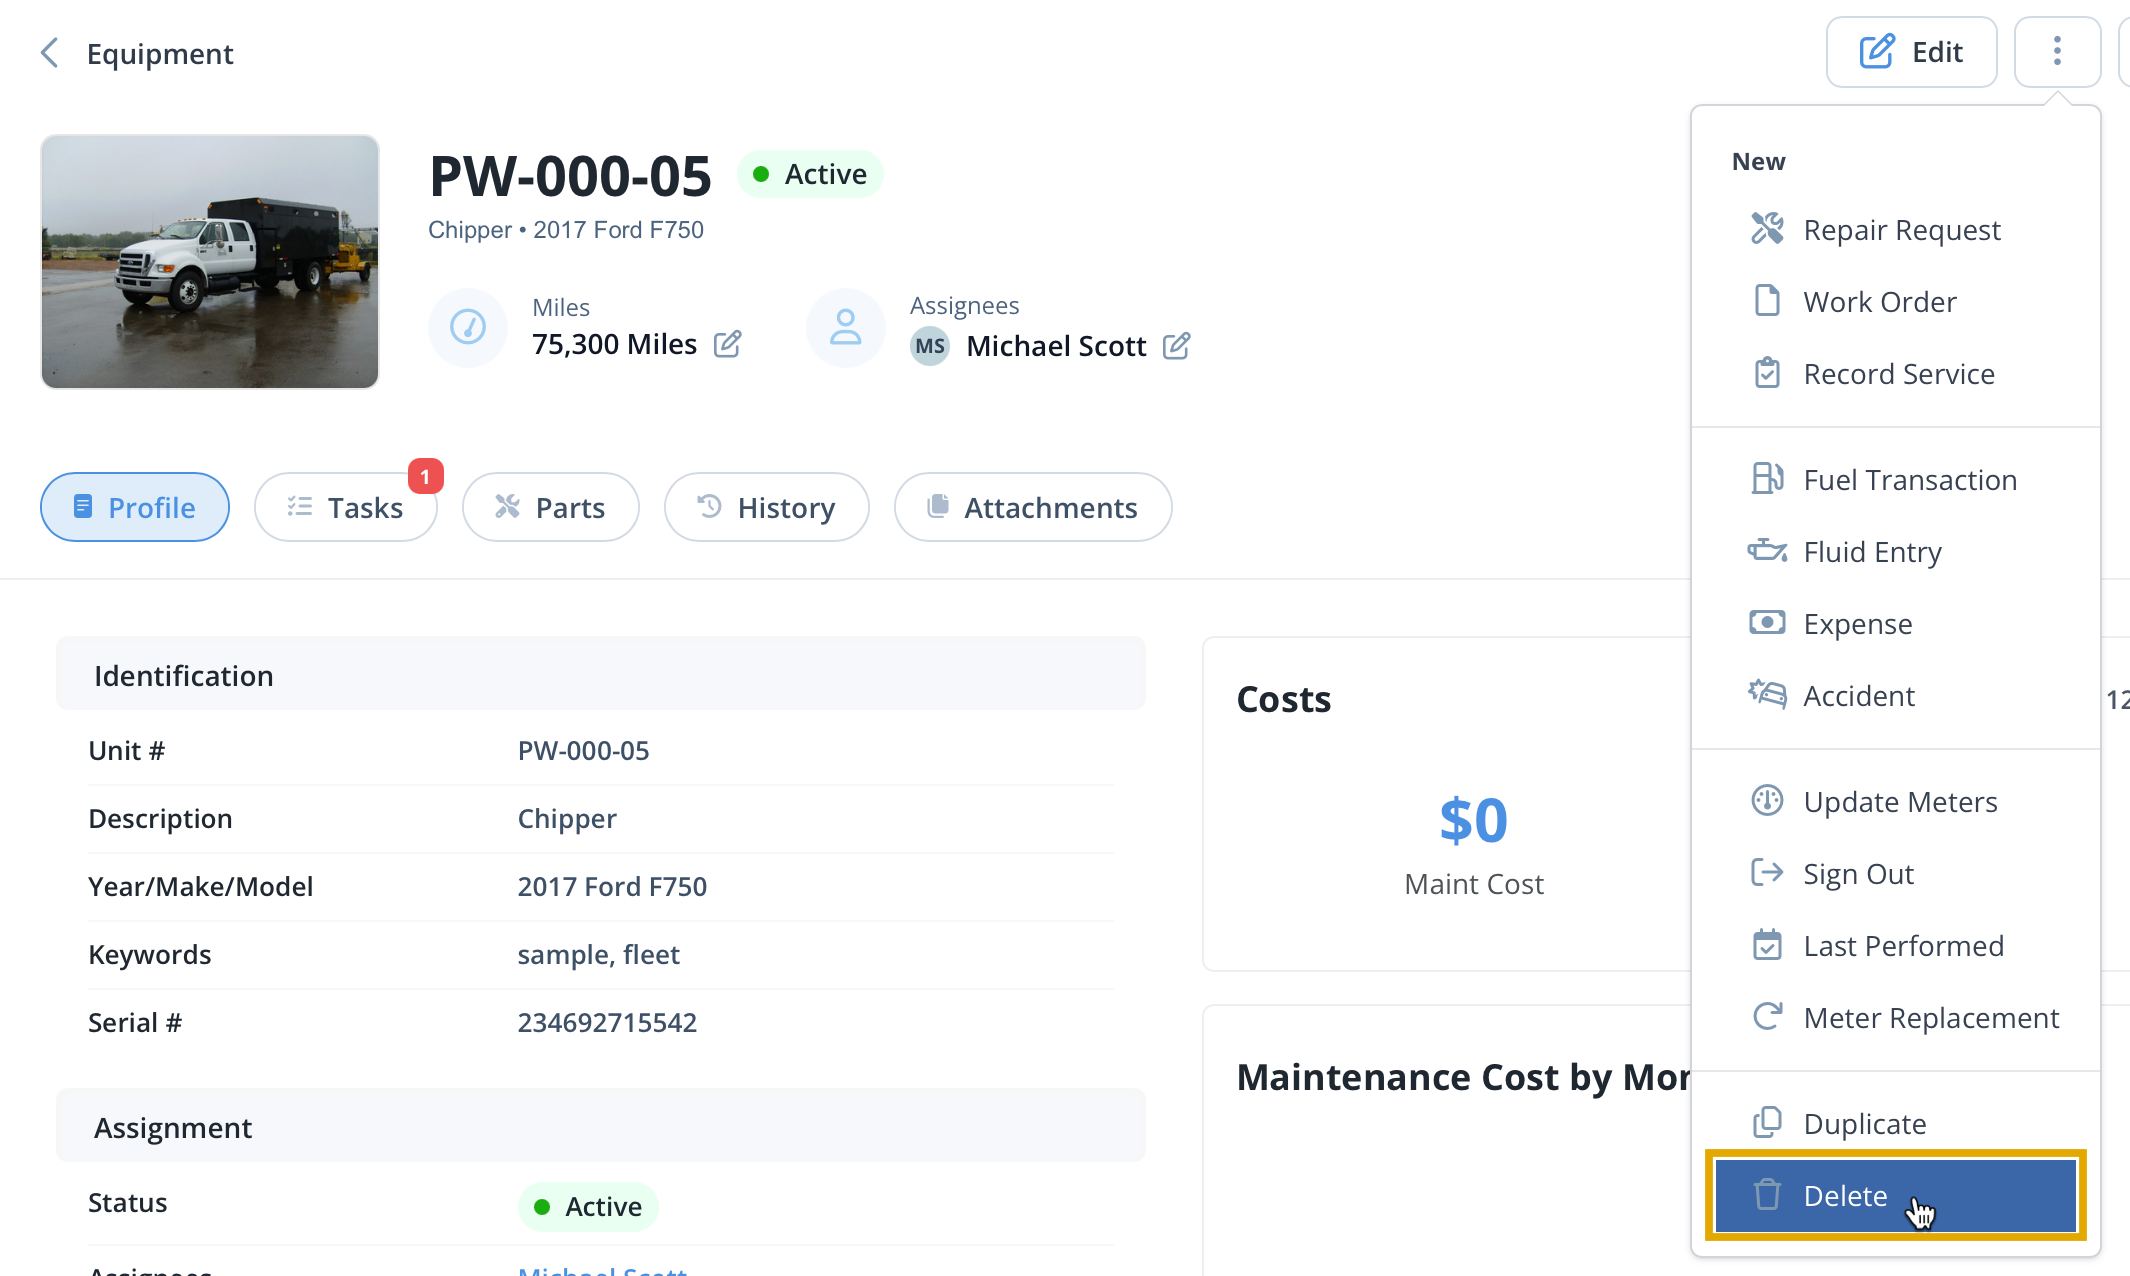
To make changes to existing equipment, from the equipment list click the action gear on the right hand side and choose Edit.

On the Edit screen, the data can be modified in any of the boxes.

To assign a picture to the equipment, click the Picture tab on the top. Click Select File to choose a picture to upload.

Delete Equipment
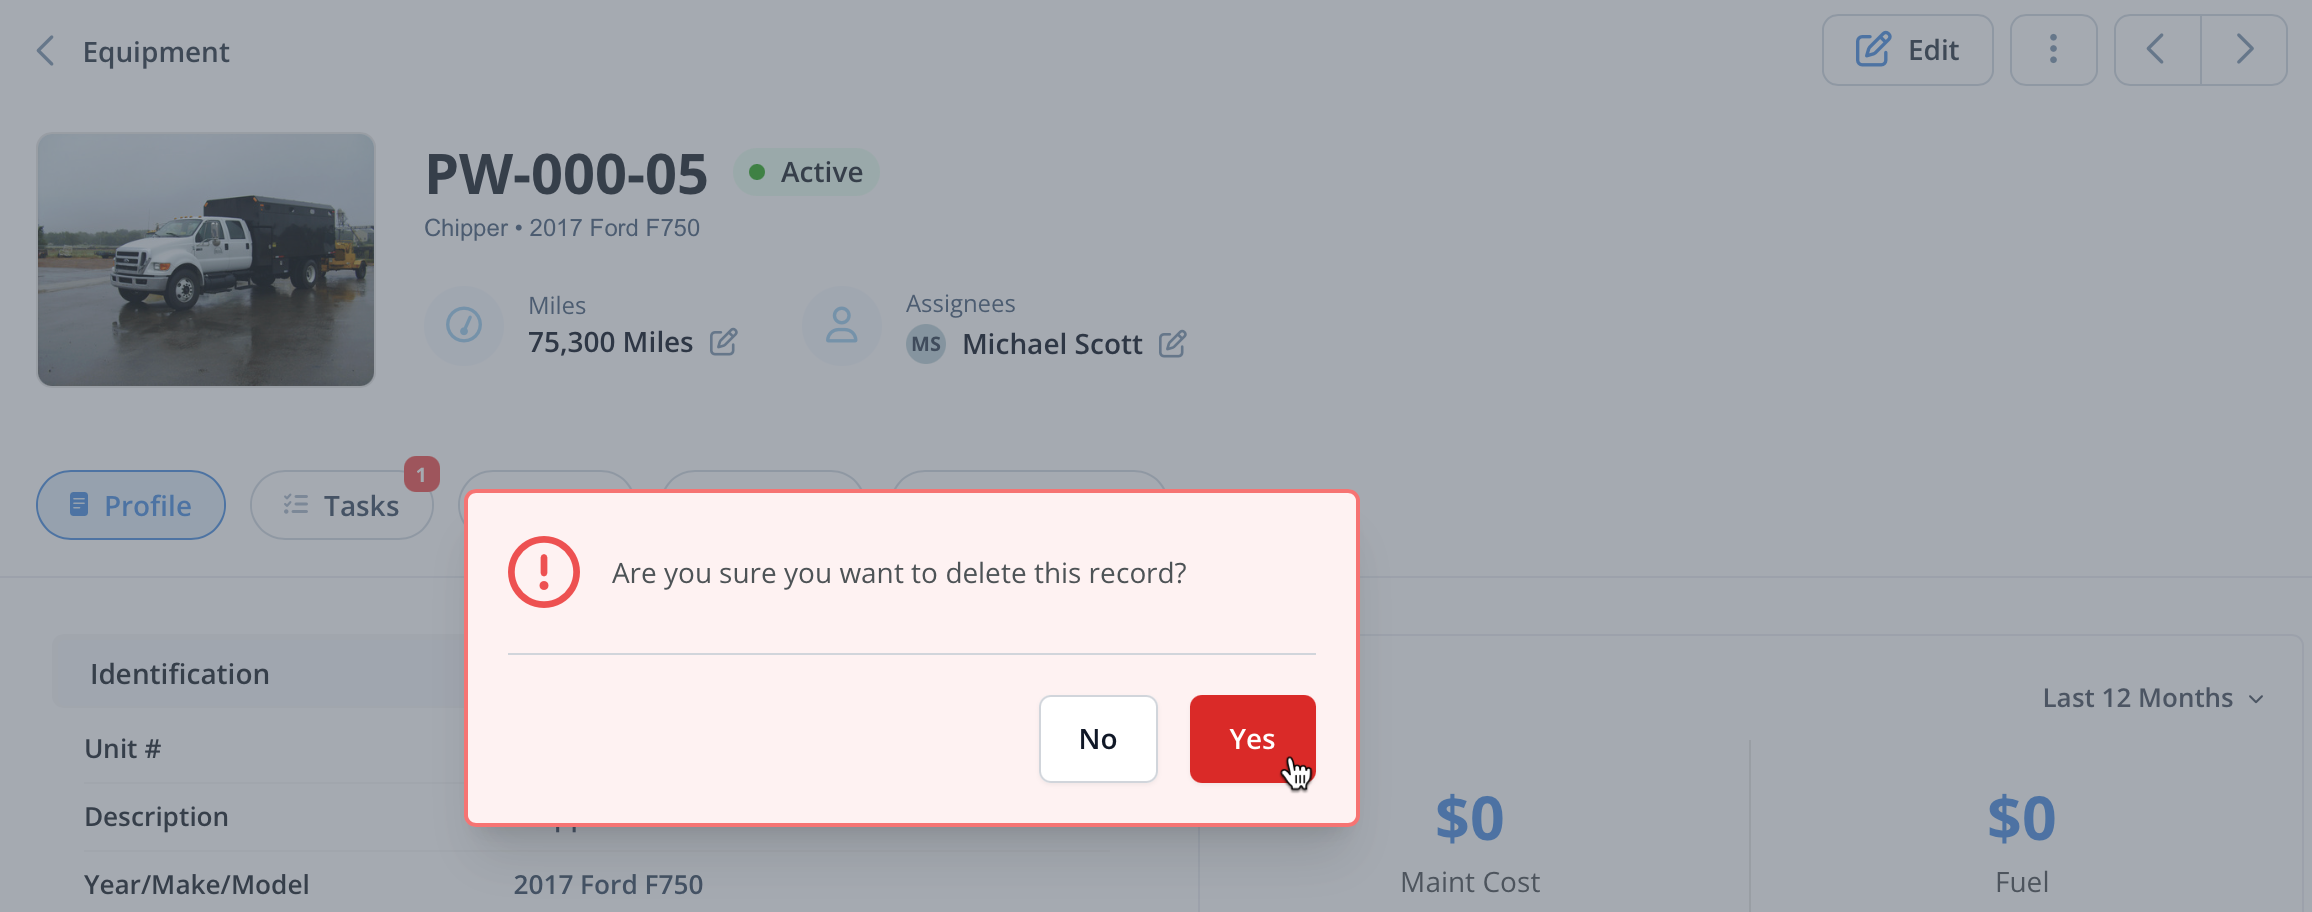
To delete equipment, click on the equipment name from the Equipment Index to get to the Profile screen. Then, click the gear icon on the top right and choose Delete. Clicking on Delete will display a confirmation box. Click Yes to continue with the delete process.
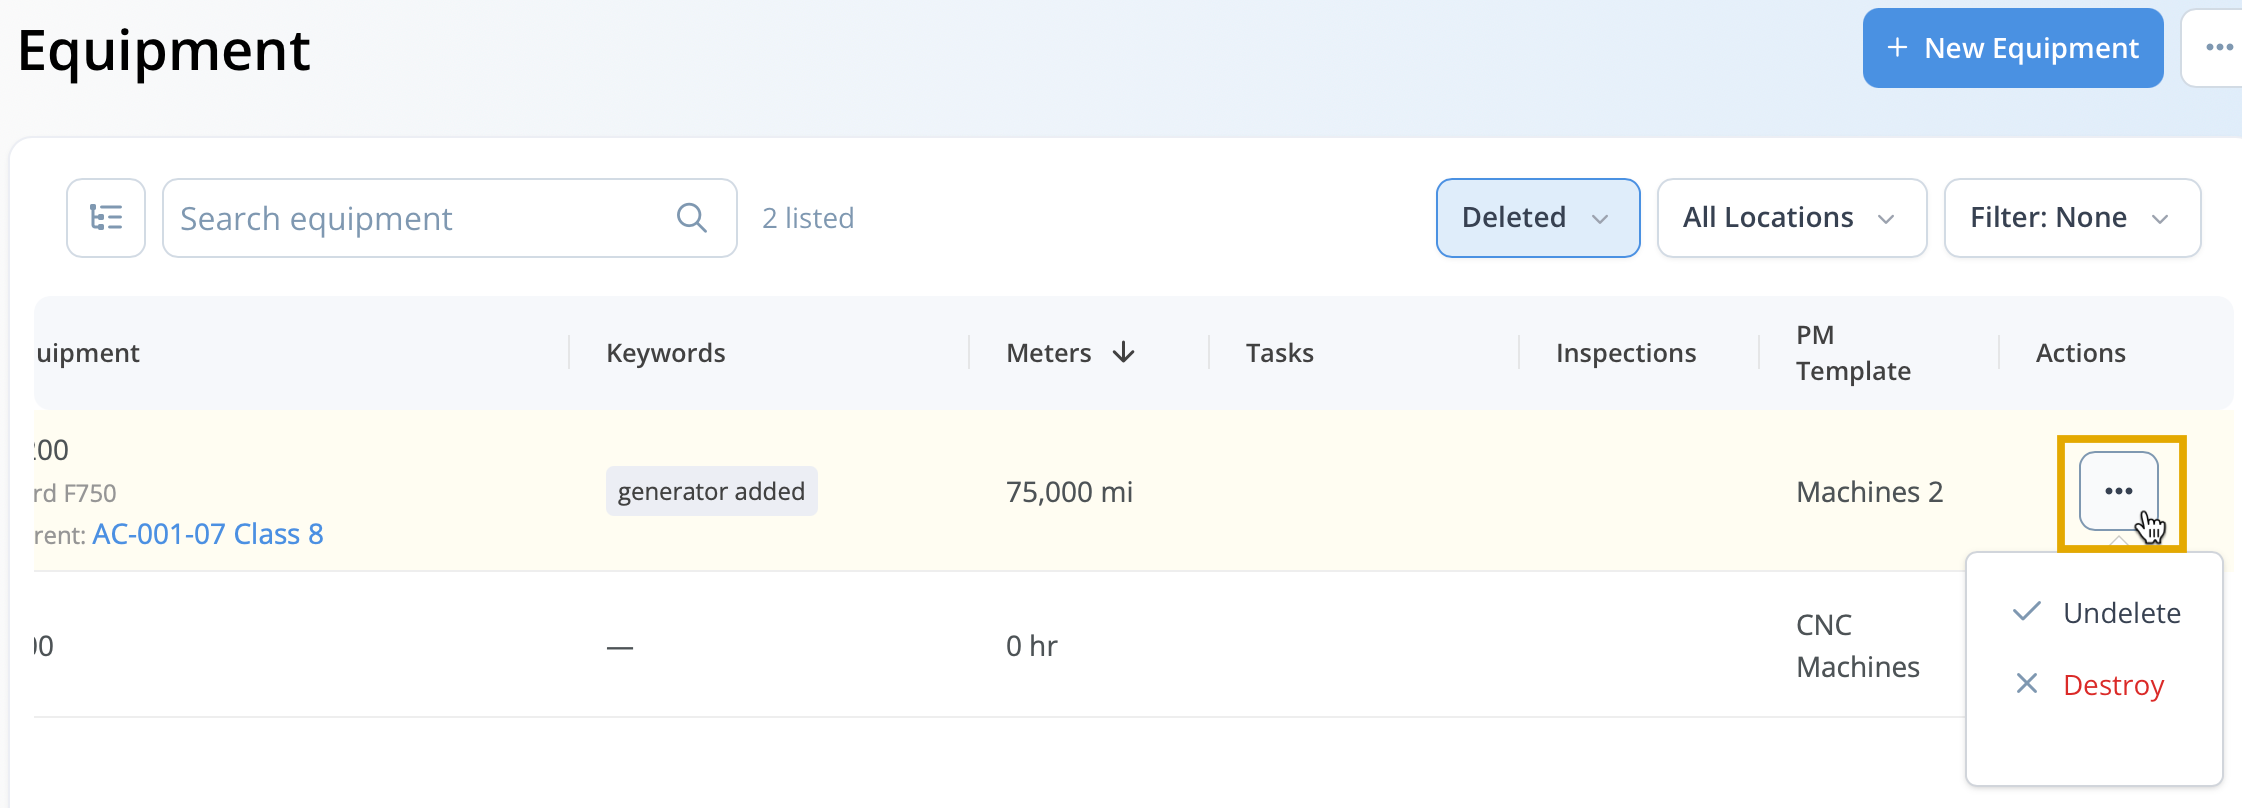
To view equipment with a Deleted status, click the blue filter underneath the Equipment heading and choose Deleted.
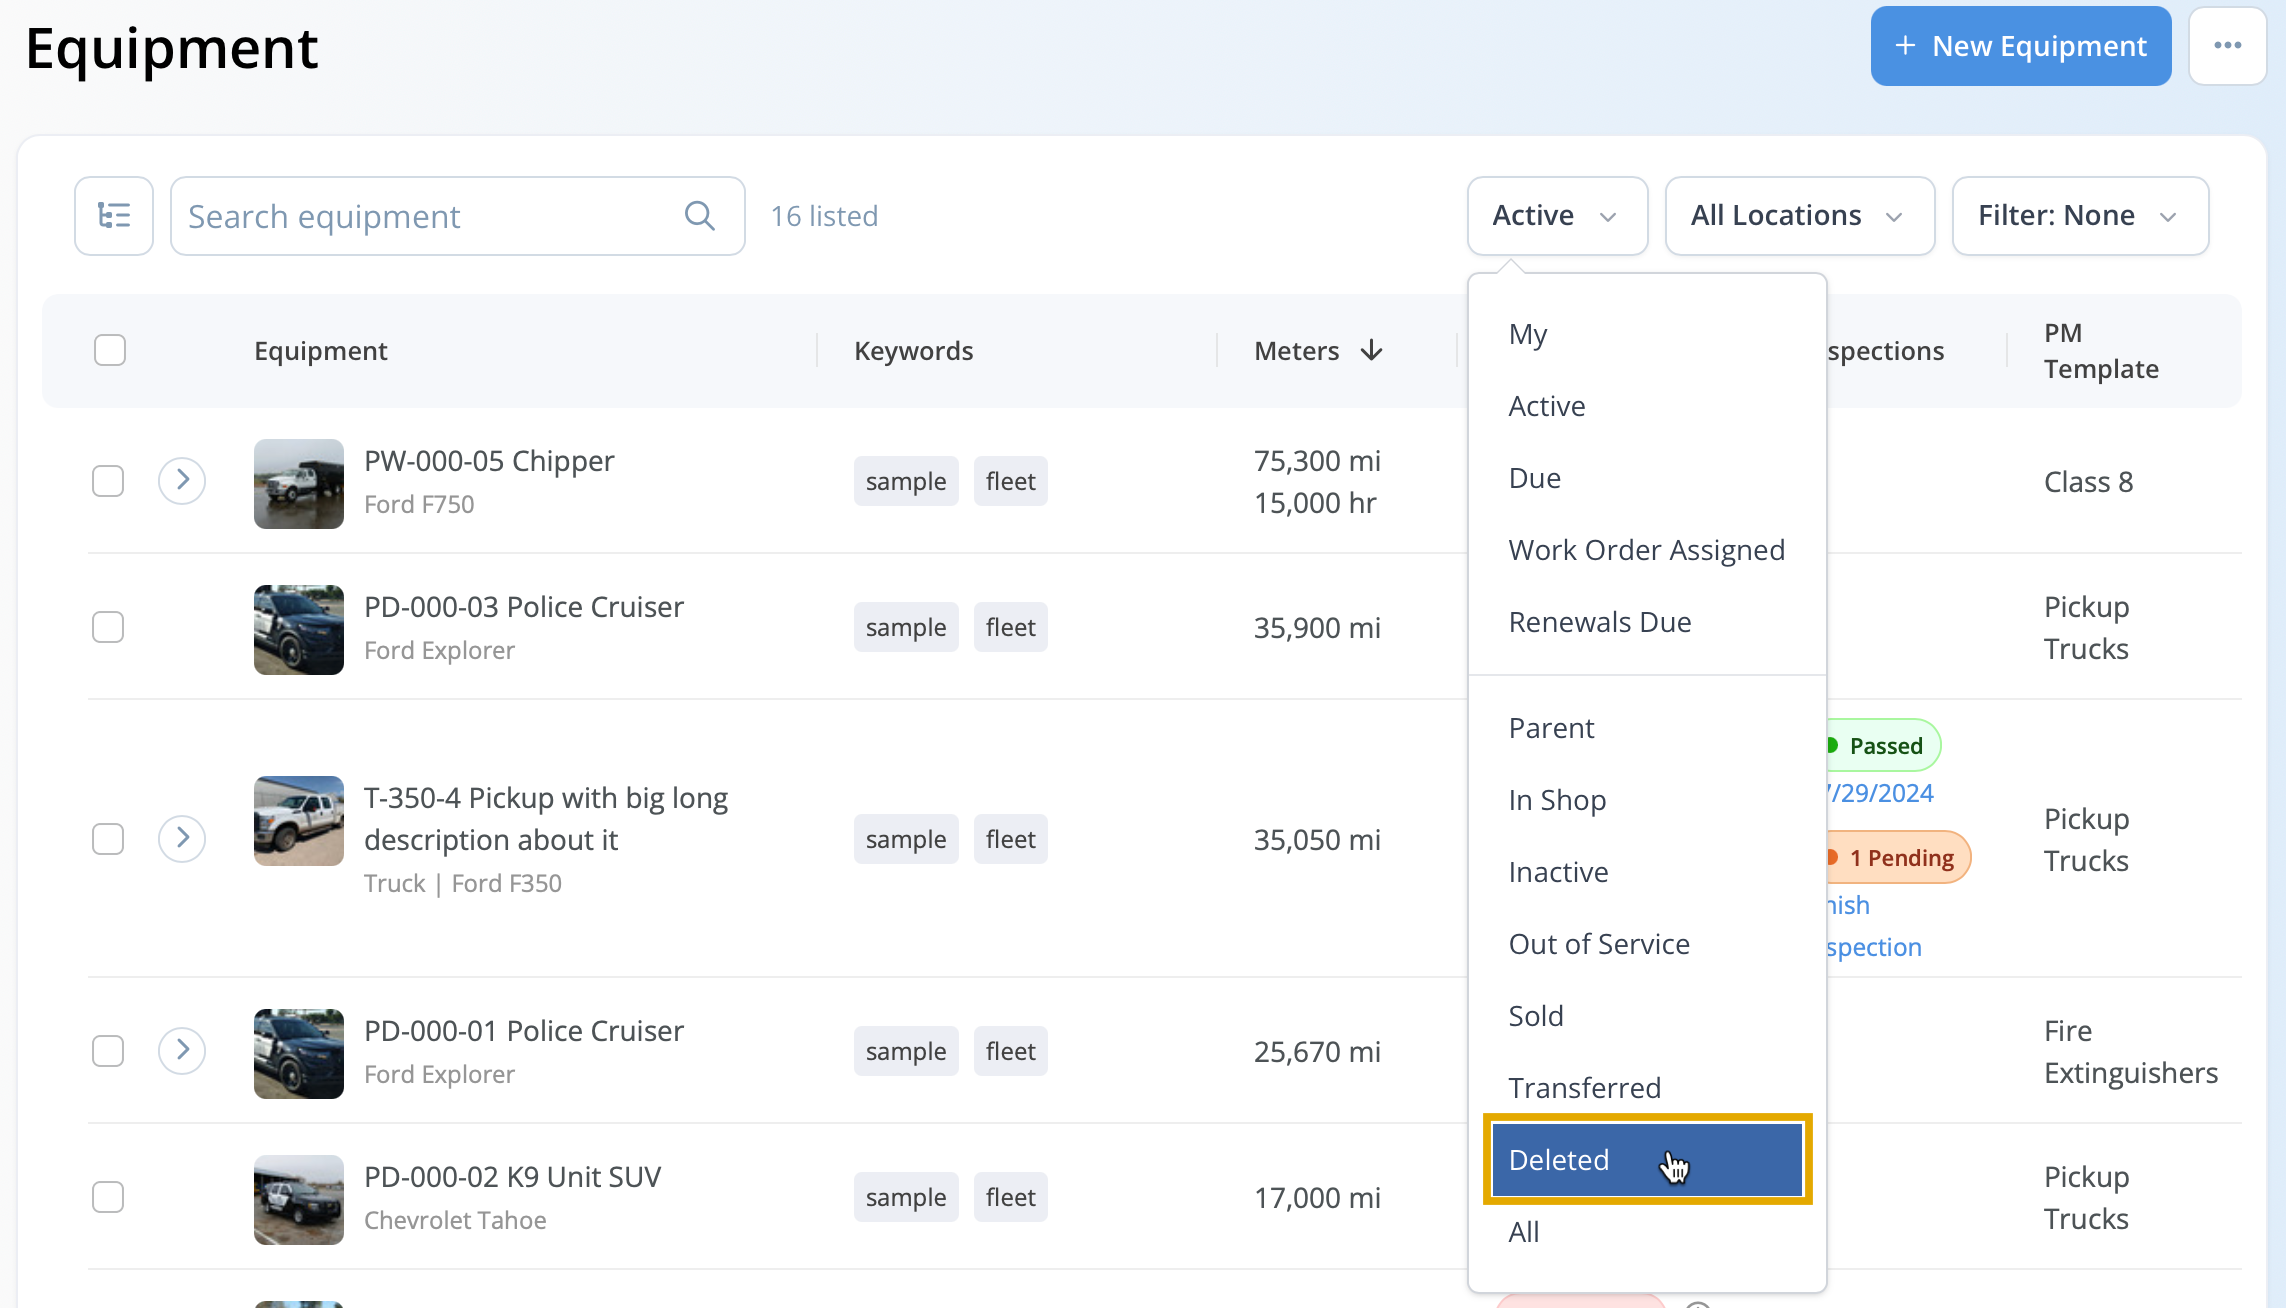
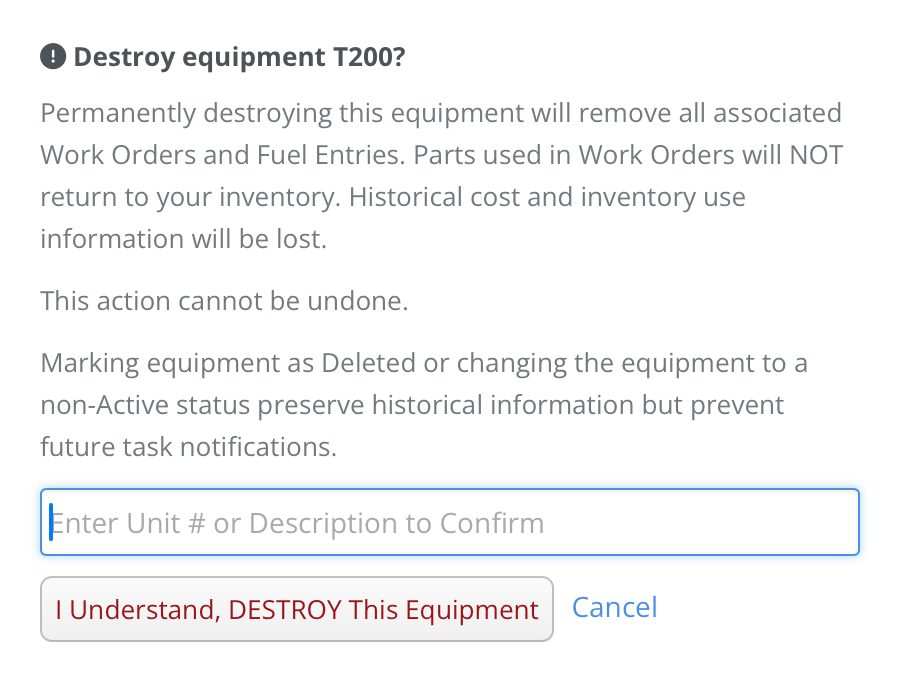
Previous units can be reviewed here, along with the option to completely destroy the unit or recover it.