Fuel Transactions
- In this article:
- Add Fuel Tranactions
- Importing Fuel Transactions
- Meter Readings
Add Fuel Transactions
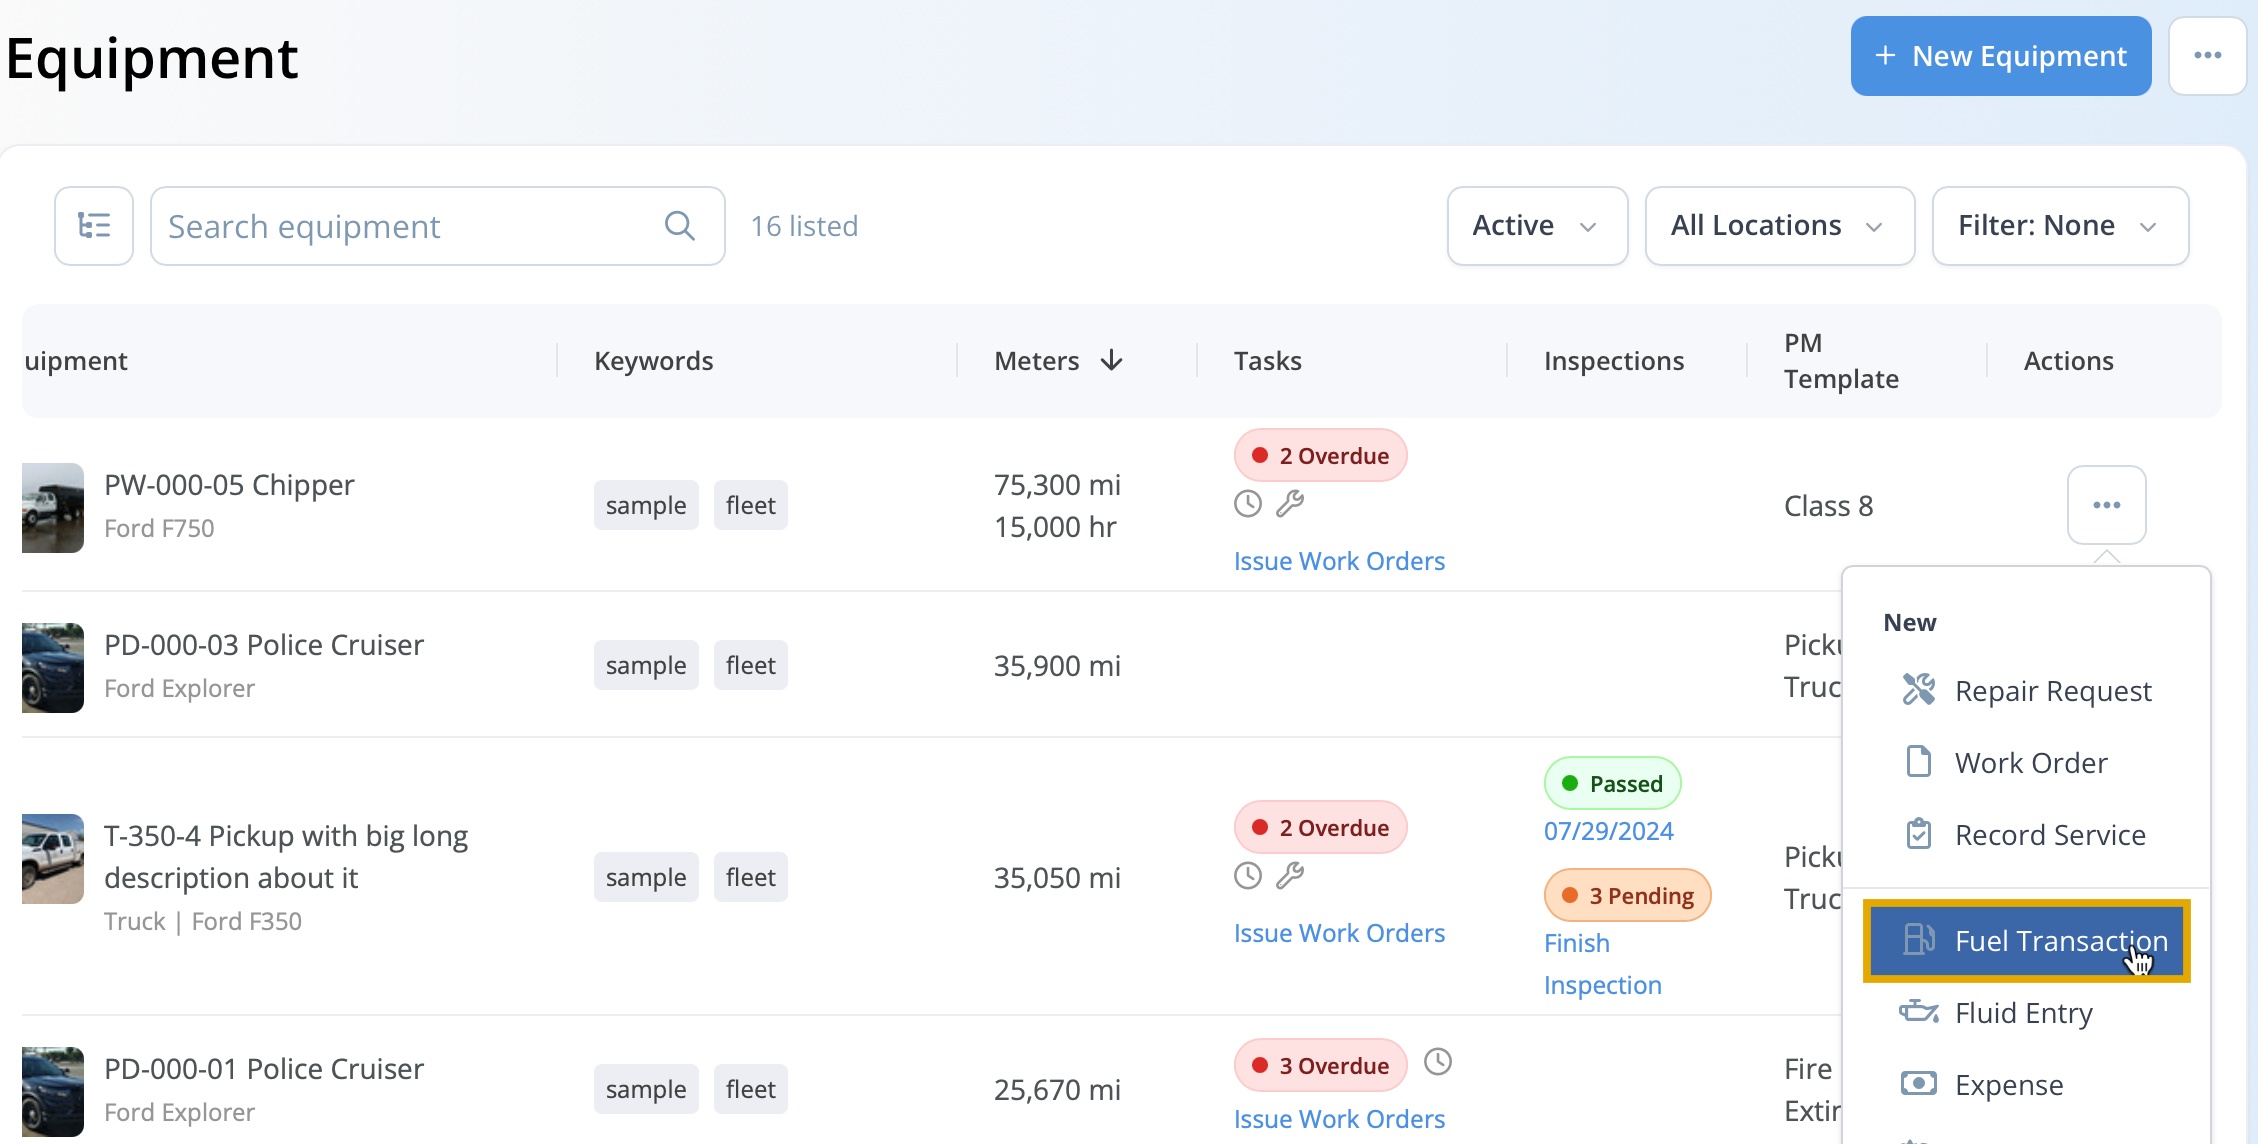
A fuel transaction can be added to a unit directly from the Equipment Index. Click the action button on the right side of the desired unit and select Fuel Transaction.
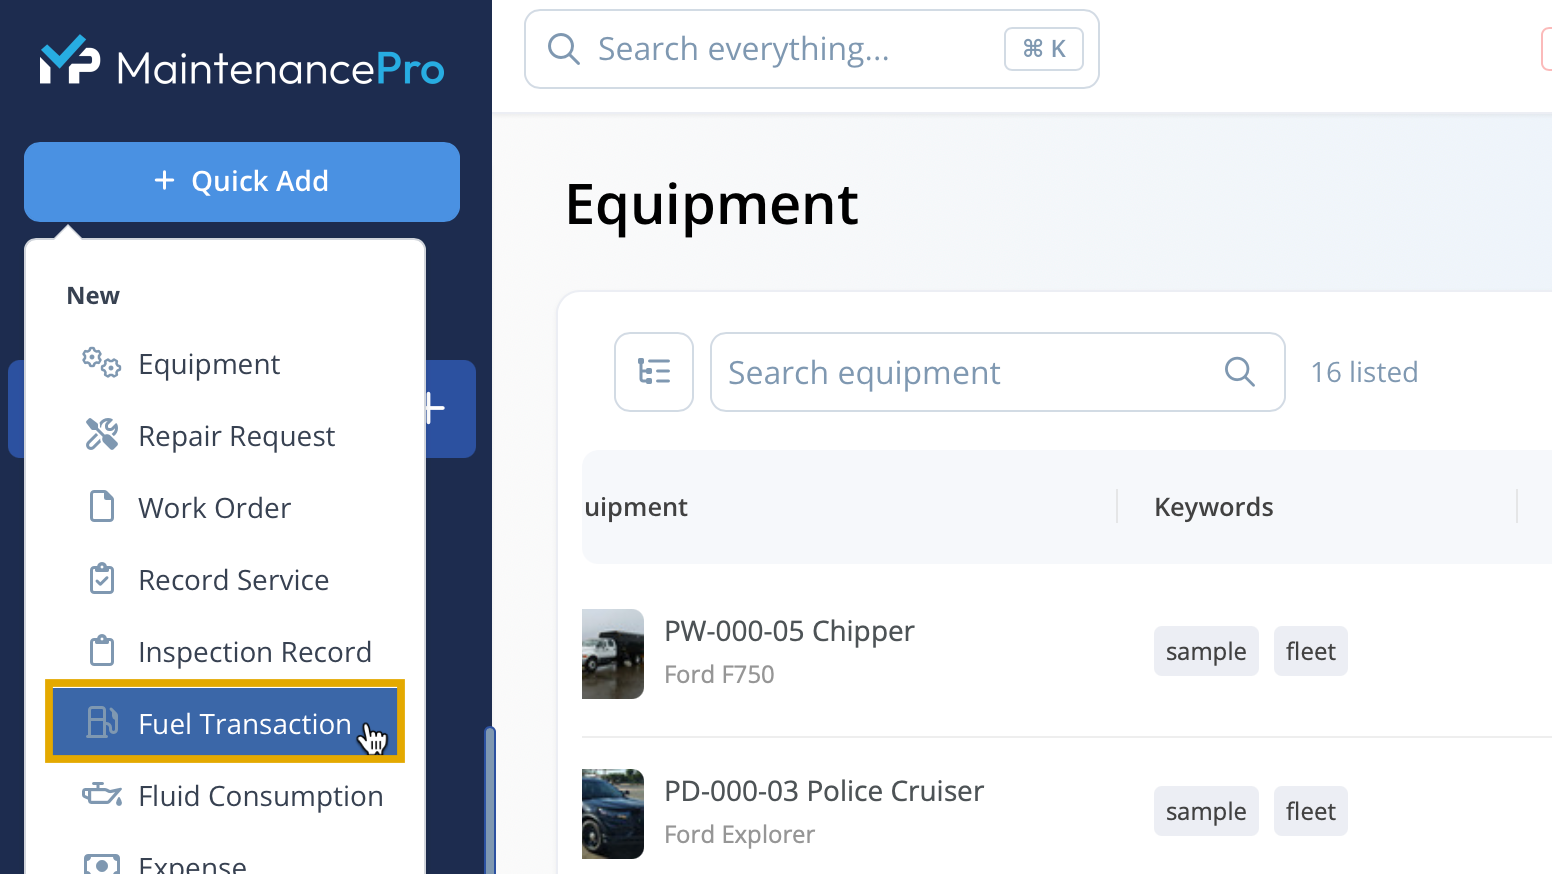
This menu option is also accessible by using + Quick Add on the side menu bar.
This will open the New Fuel Transaction screen.
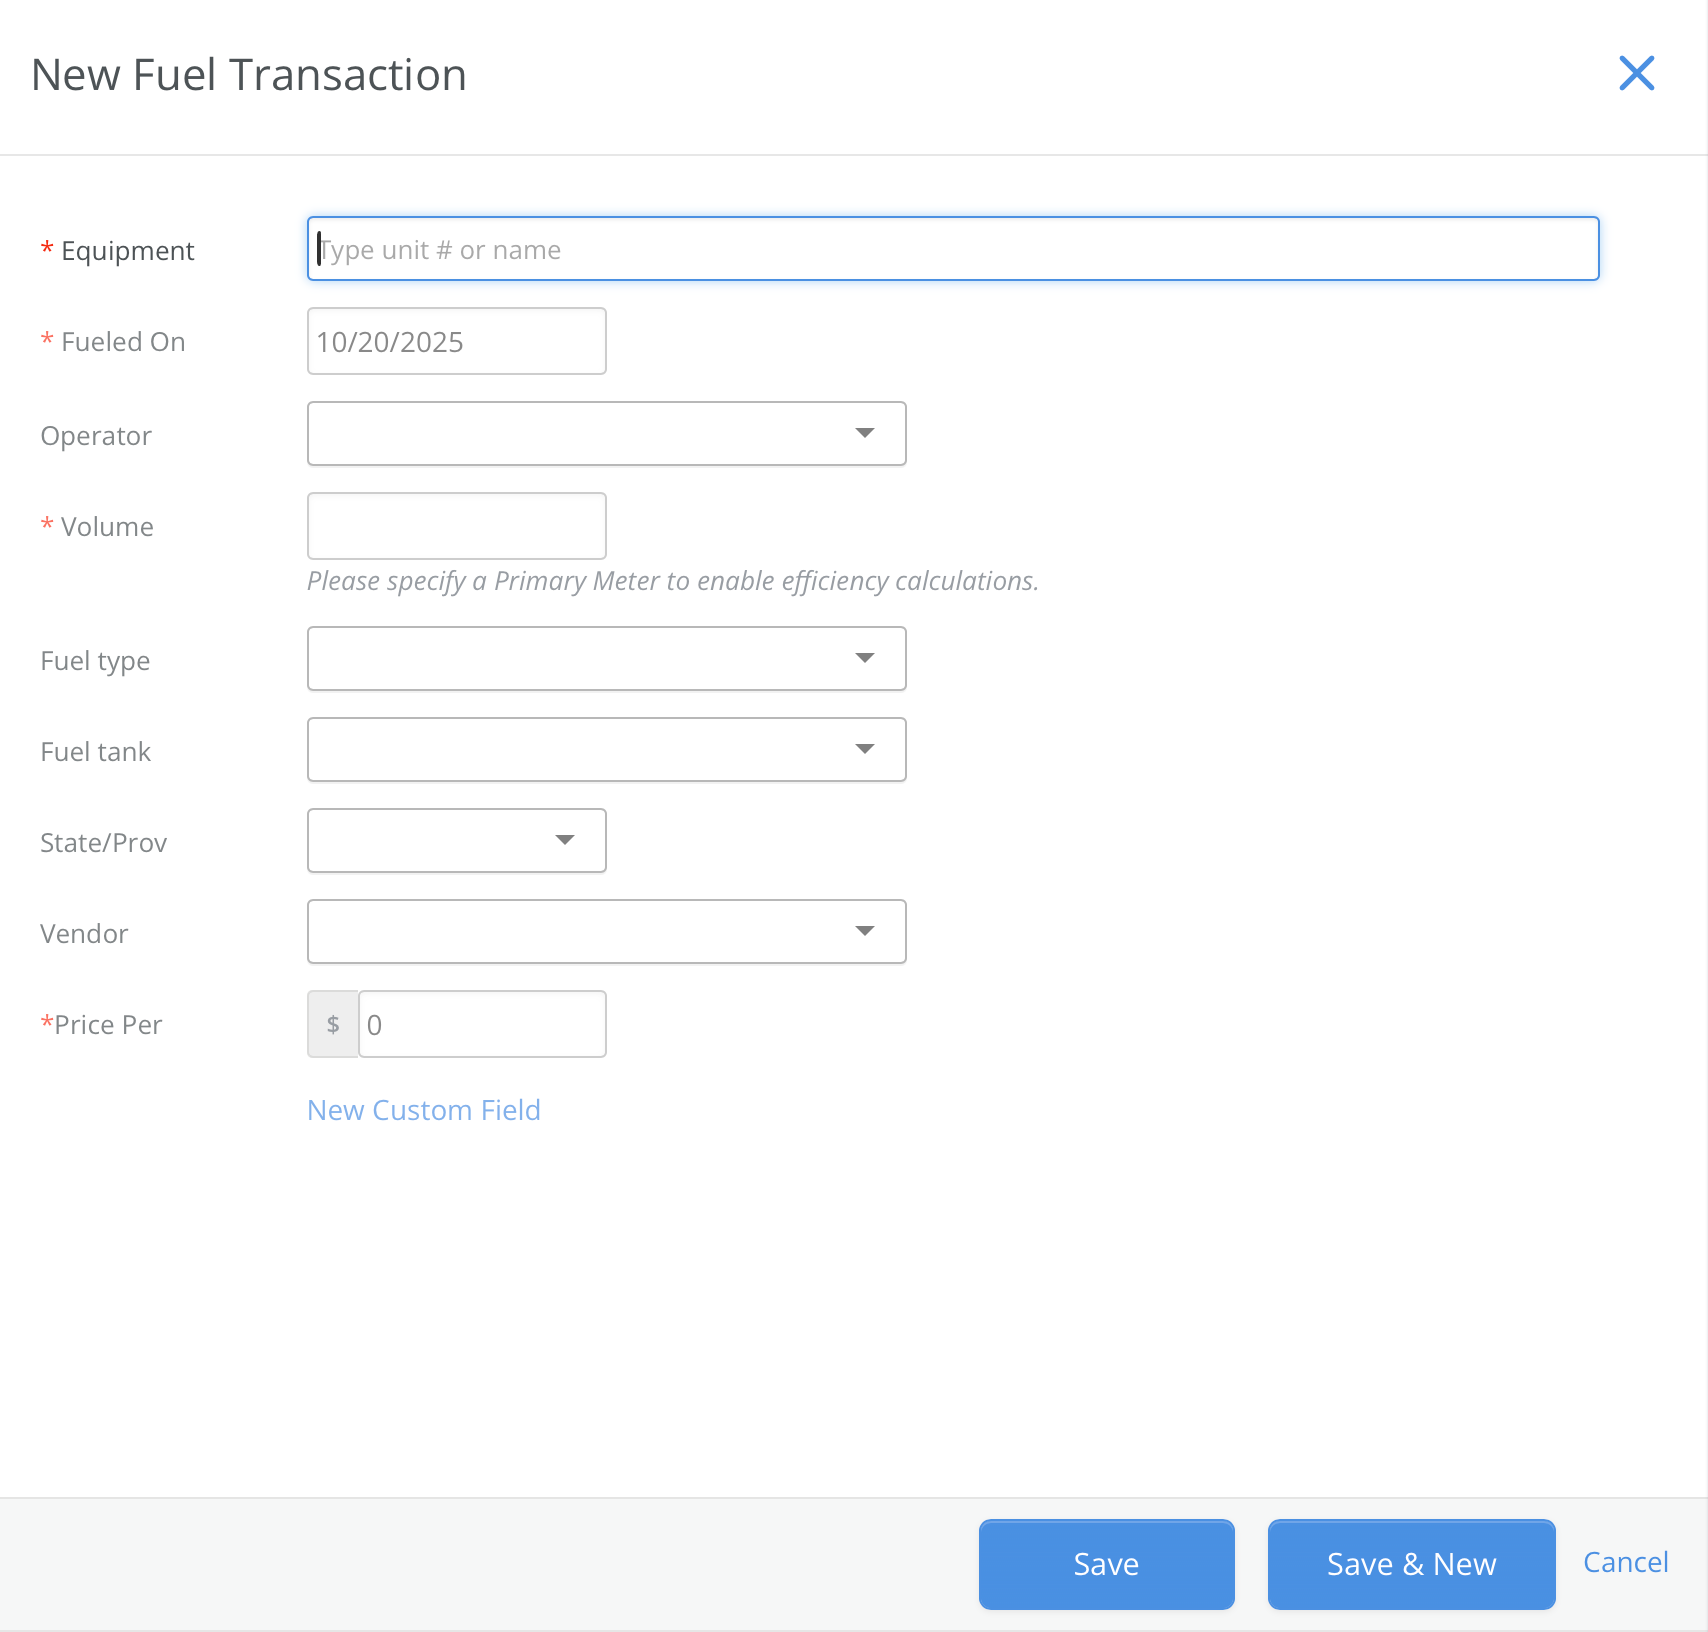
Fields marked with a red asterisk (*) are required; all other fields are optional.
Equipment: refers to the unit involved in the fuel transaction. If a unit is not already selected, one must be chosen.
Fueled On: indicates the date when the transaction occurred. Backdating is allowed if necessary.
Last Hours: shows the previous meter reading from the last fuel transaction. This field is optional and typically appears only if no prior fuel transactions exist for the equipment.
Current Hours: represents the meter reading for the current fuel transaction. If this value exceeds the current primary odometer reading, the main odometer will be updated accordingly.
Gallons / Liters: indicates the volume of fuel used in this transaction.
Vendor: specifies the fuel supplier.
State / Prov: identifies the location of the transaction.
Price per Gallon / Liter: records the cost of the fuel for this transaction.
Custom Fields: are optional and may be used to store additional data if desired.
Save: records the transaction in history. Save & New performs the same action but returns to this window to enter the next transaction.
Viewing Fuel Transaction History
To view past fuel transactions for a unit, select the unit's name from the Equipment Index. This opens the Equipment Profile page. From there, navigate to the History tab and select the Fuel category.
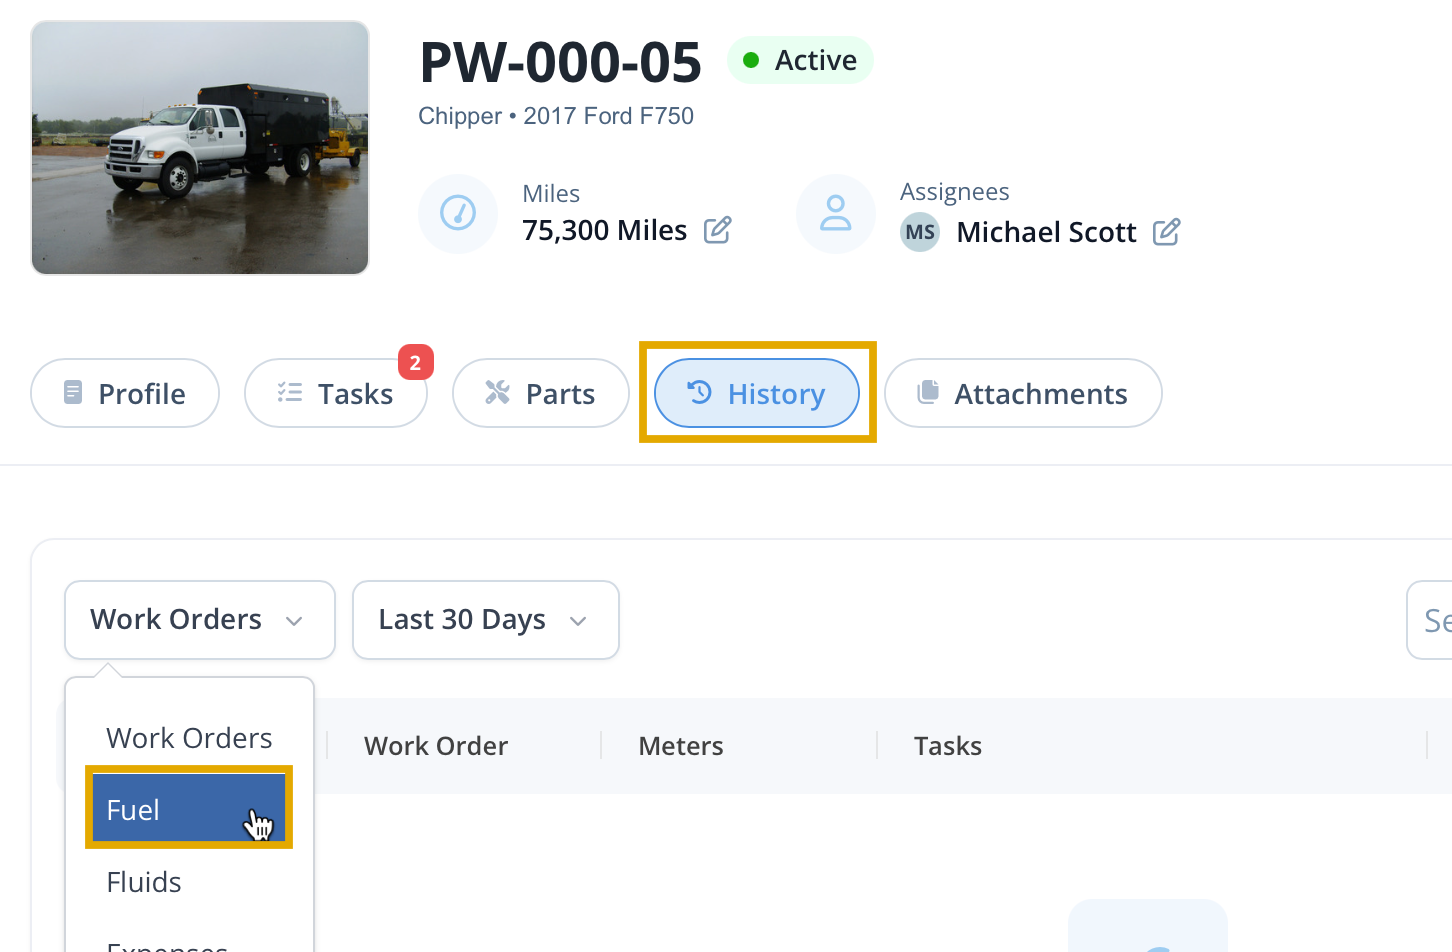
A date range for viewing transactions can be set on the left side of the screen. The blue New button on the right allows creation of a new fuel transaction. Any row in the history screen can be selected to edit or delete a previous transaction.
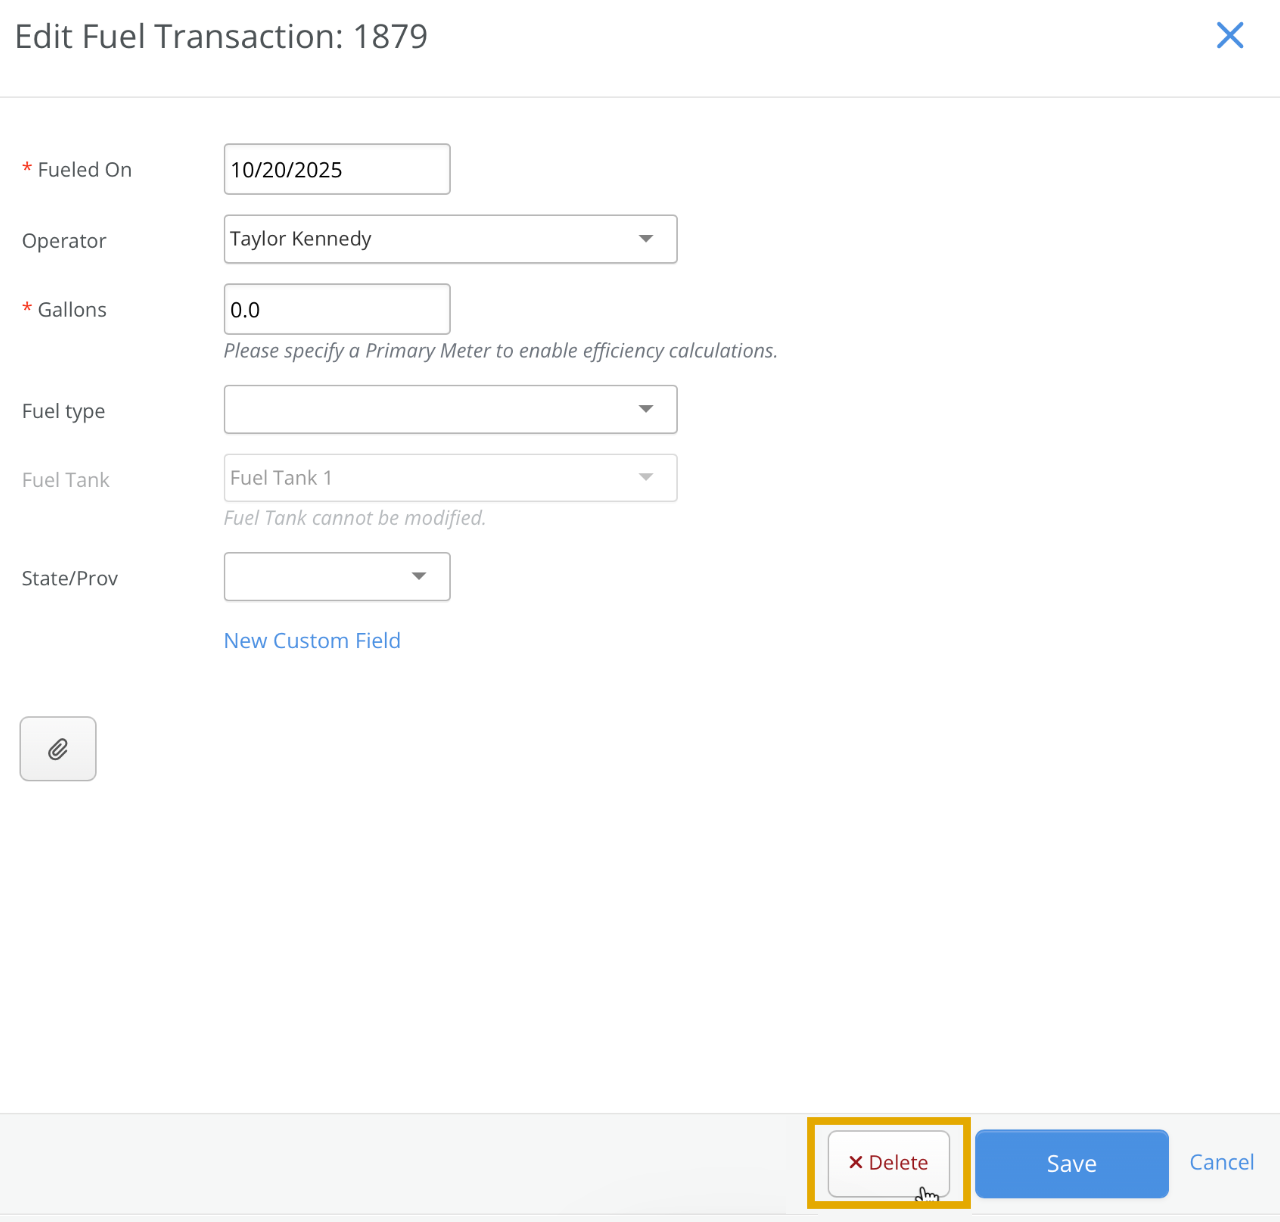
When editing an existing fuel transaction from history, a Delete button will appear at the bottom. This can be used to remove erroneous or duplicate entries.
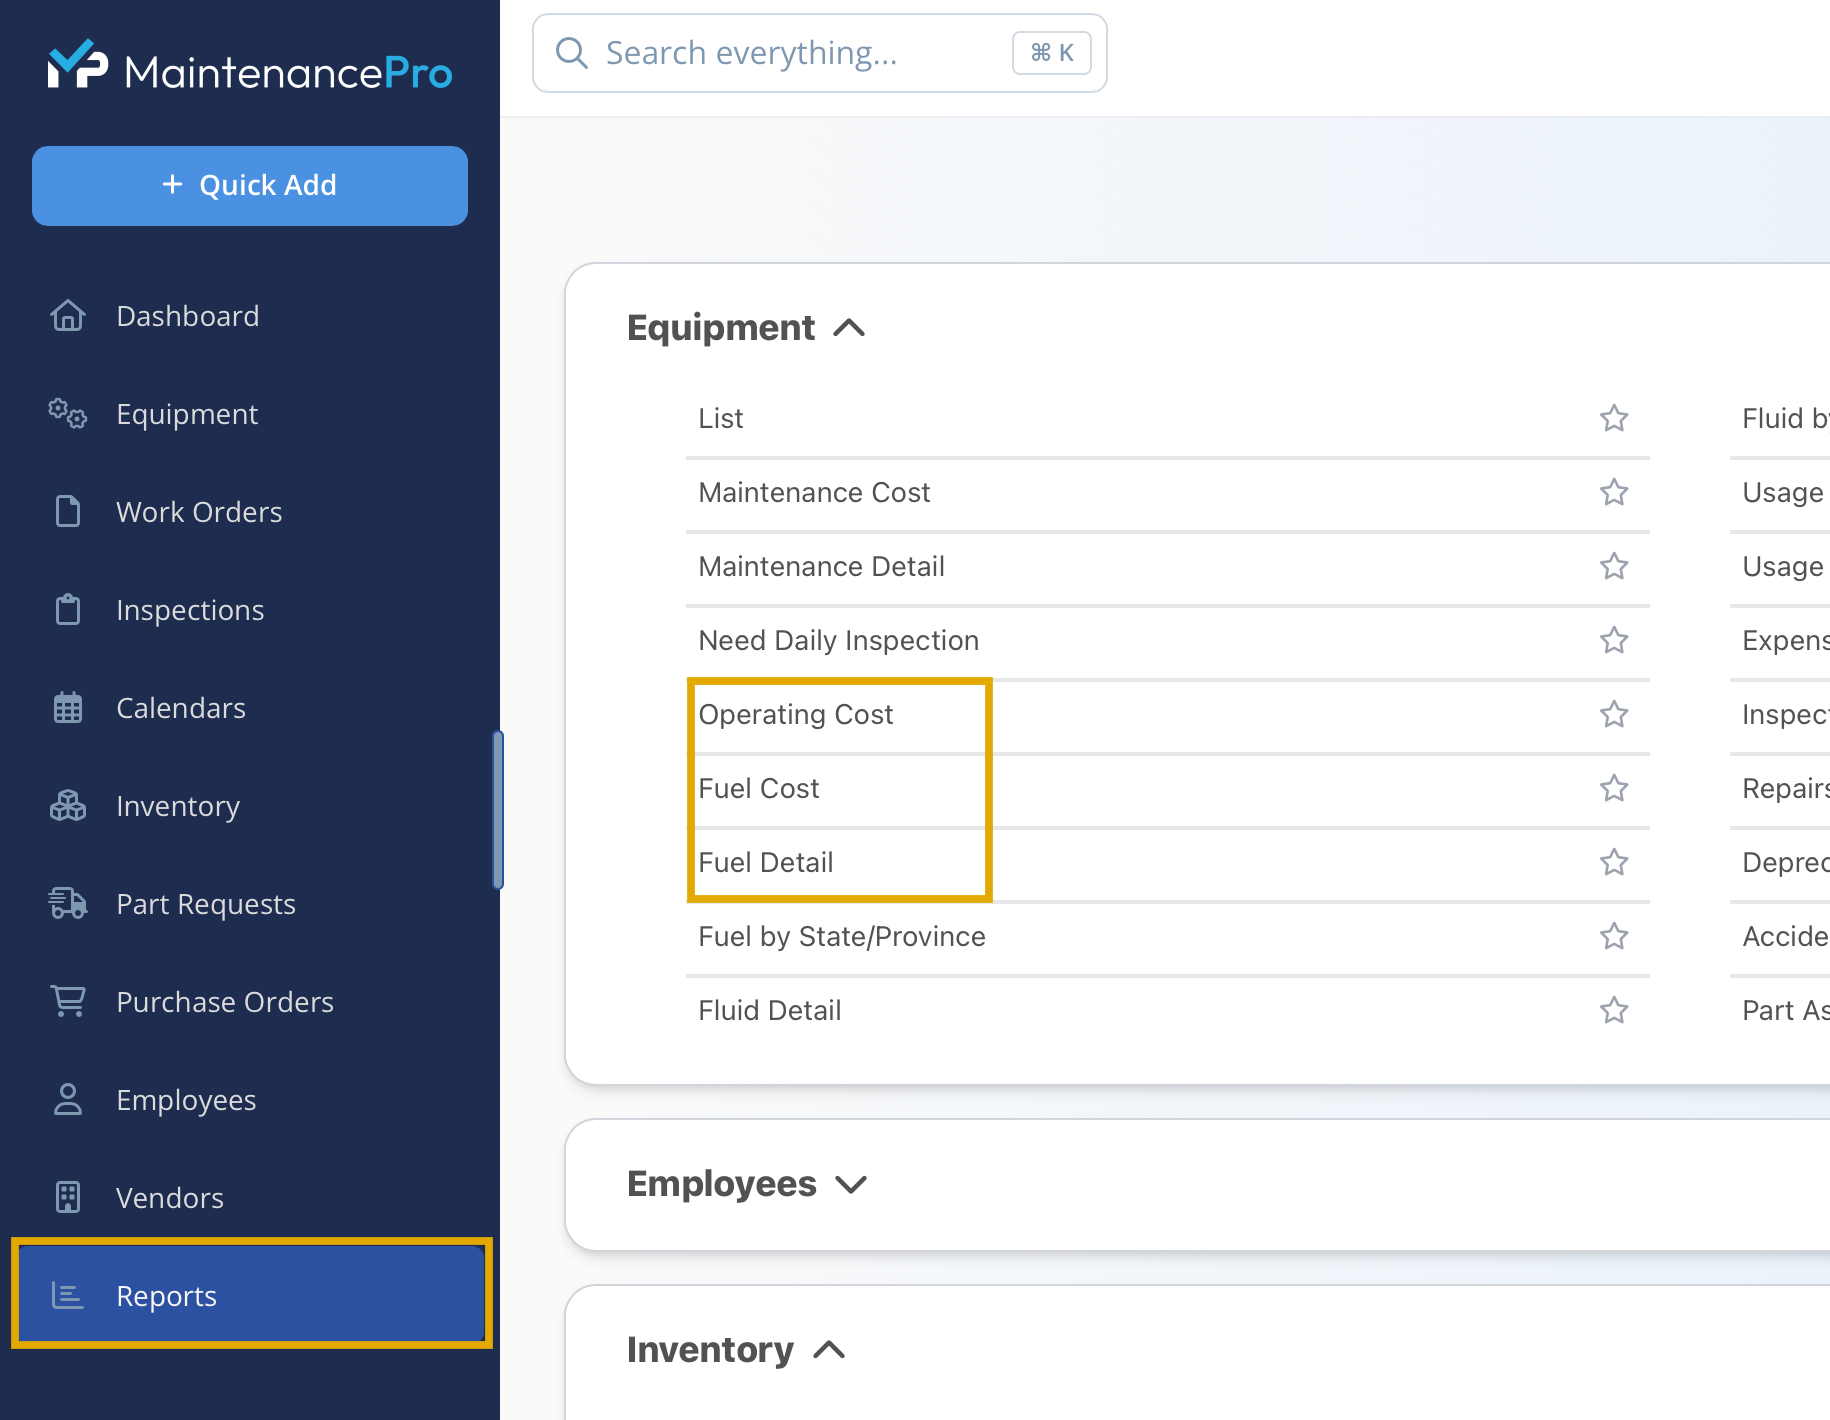
Reports
Fuel costs are reflected in the Operating Cost, Fuel Cost, and Fuel Detail reports.
Importing Fuel Transactions And Meter Readings
Maintenance Pro supports importing CSV files containing fuel transactions and meter readings, streamlining data entry and eliminating the need for manual input.
Fuel Import
The following data can be imported as fuel transactions using a CSV file.
Mandatory fields:
- Equipment Unit ID (can substitute this with a Fuel Card # if needed)
- Fuel Transaction Date
- Primary Odometer Reading
- Volume Of Fuel (how much fuel was used for the transaction)
- Unit Price
Optional fields:
- Vendor Name
- State
Here is an example of what we're looking for:

A sample CSV file can be found here:
MaintenancePro-Fuel-Import.csv
Turning On Fuel Import
If fuel import is not already enabled on the account, submit a copy of the fuel file to be imported. The import settings will then be configured, and fuel import will be activated. Send the file via email to support@mtcpro.com, including the organization name.
Once fuel import is enabled, a CSV file of transactions can be tested. Click the cloud icon with the up arrow in the top-right corner and select the Fuel Import option.

The system will prompt for the file to import. Locate the CSV file in the file explorer window and select Open. The system will then process the import.

Once the file has finished processing, fuel transactions can be viewed in the unit’s history. To access this, select the unit from the equipment list, navigate to the History tab, and choose the Fuel category.

To reverse a fuel import, click the cloud icon and select Manage. Choose the import to be undone and click the Undo Import button. Note that imports can only be reversed within 72 hours of processing.

Meter Import
The same process applies to meter imports. The following values can be imported using a CSV file:
- Equipment Unit ID
- Meter Reading Date
- Primary Meter
- Secondary Meter (optional if you do not use a secondary meter on your equipment).
The following is an example of the expected format:

A sample template file for Meter Updates is provided below:
MaintenancePro-Meter-Import.csv
To enable meter import, submit a copy of the meter template via email. The import settings will be configured and the feature activated. Send the template to support@mtcpro.com, including the organization name.
To perform a meter update, click the cloud icon and select the Meter Import option. In the pop-up window, choose the CSV file and click Open.

The import will process in the same manner as fuel imports. Meter imports can also be undone within 72 hours if necessary.