Scheduled Reports (Enterprise)
- In this article:
- Overview
- Create New Scheduled Report
- Manage Scheduled Report
Overview
Reports can now be automatically distributed via email at specified intervals.
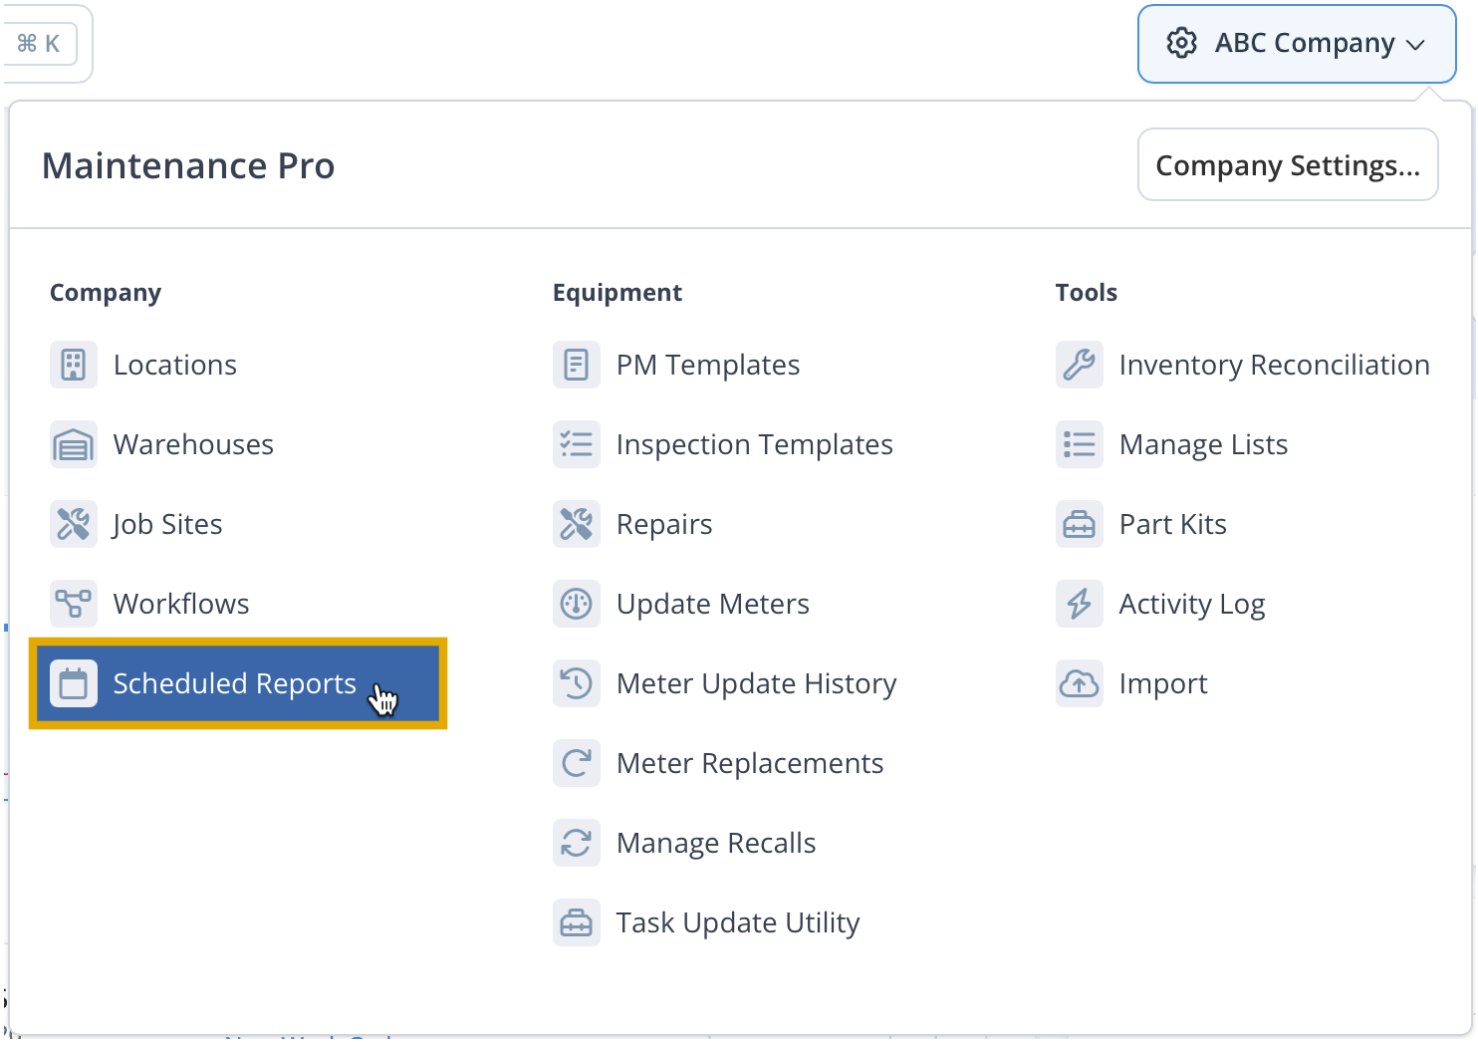
The Scheduled Reports list can be accessed by selecting Scheduled Reports from the company name located in the upper right corner of the program.
Create Scheduled Report
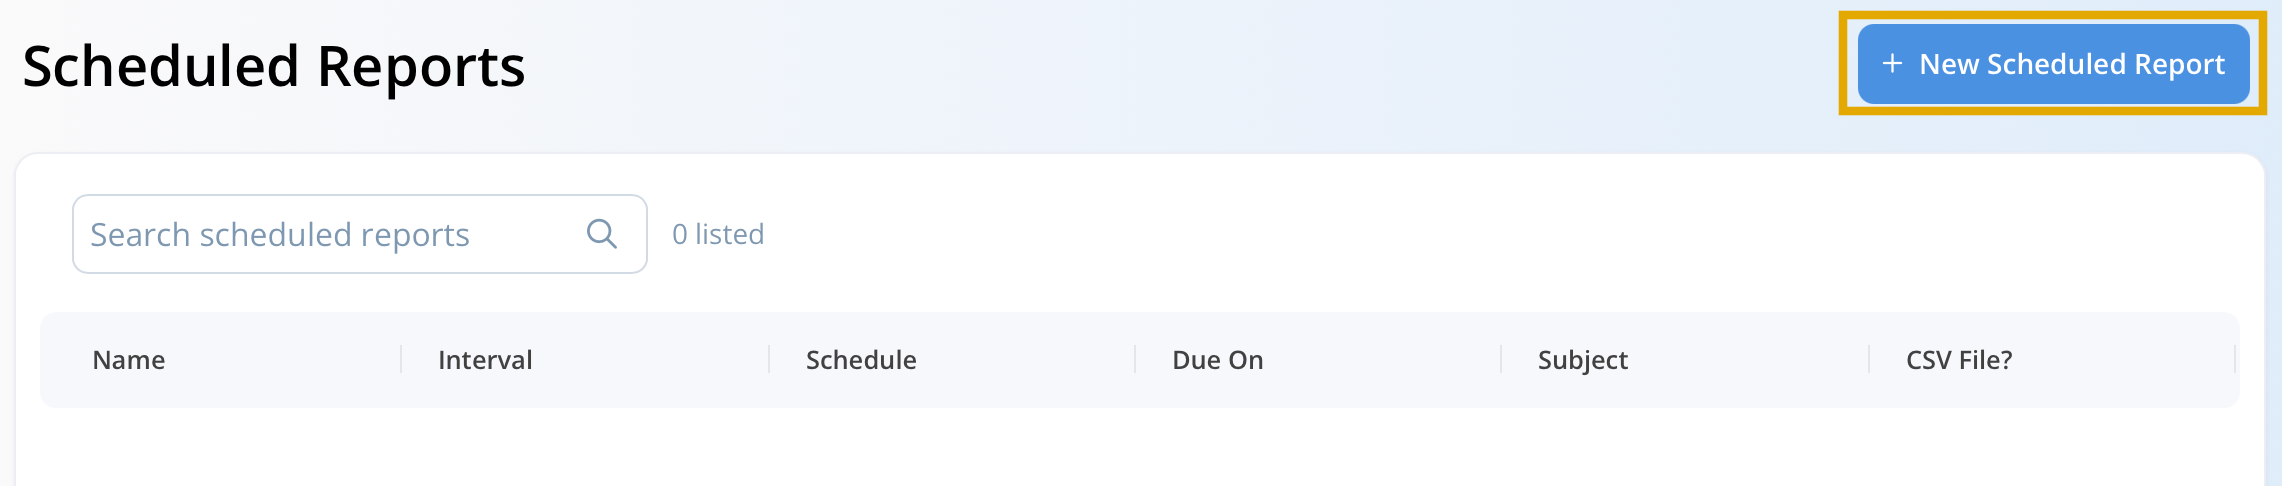
Select Scheduled Reports from the gear icon in the top-right corner of the program. To create a new report, click the blue New button in the upper-right corner.
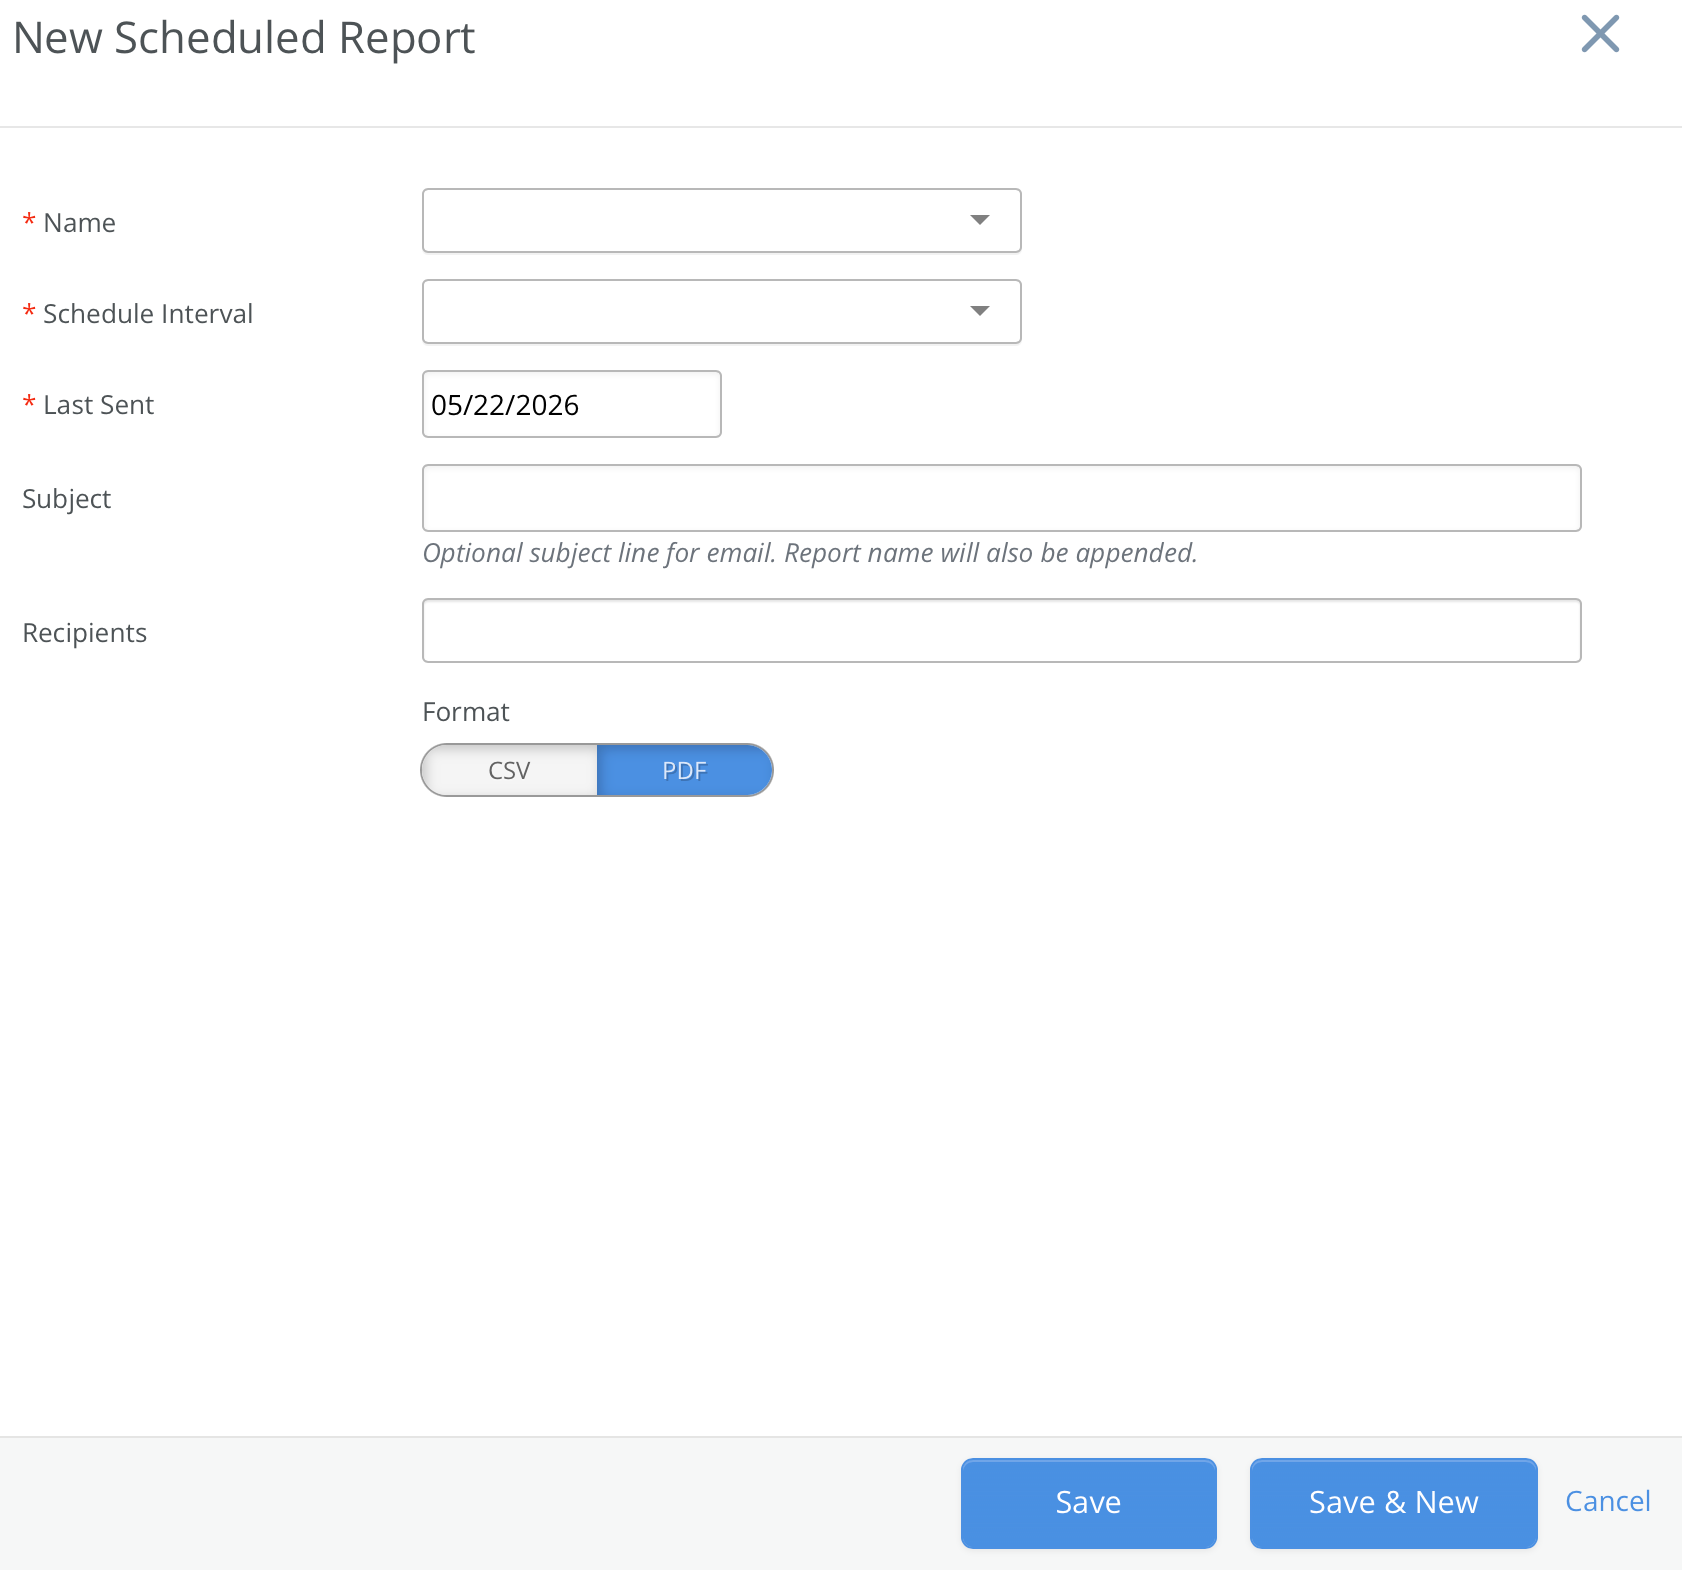
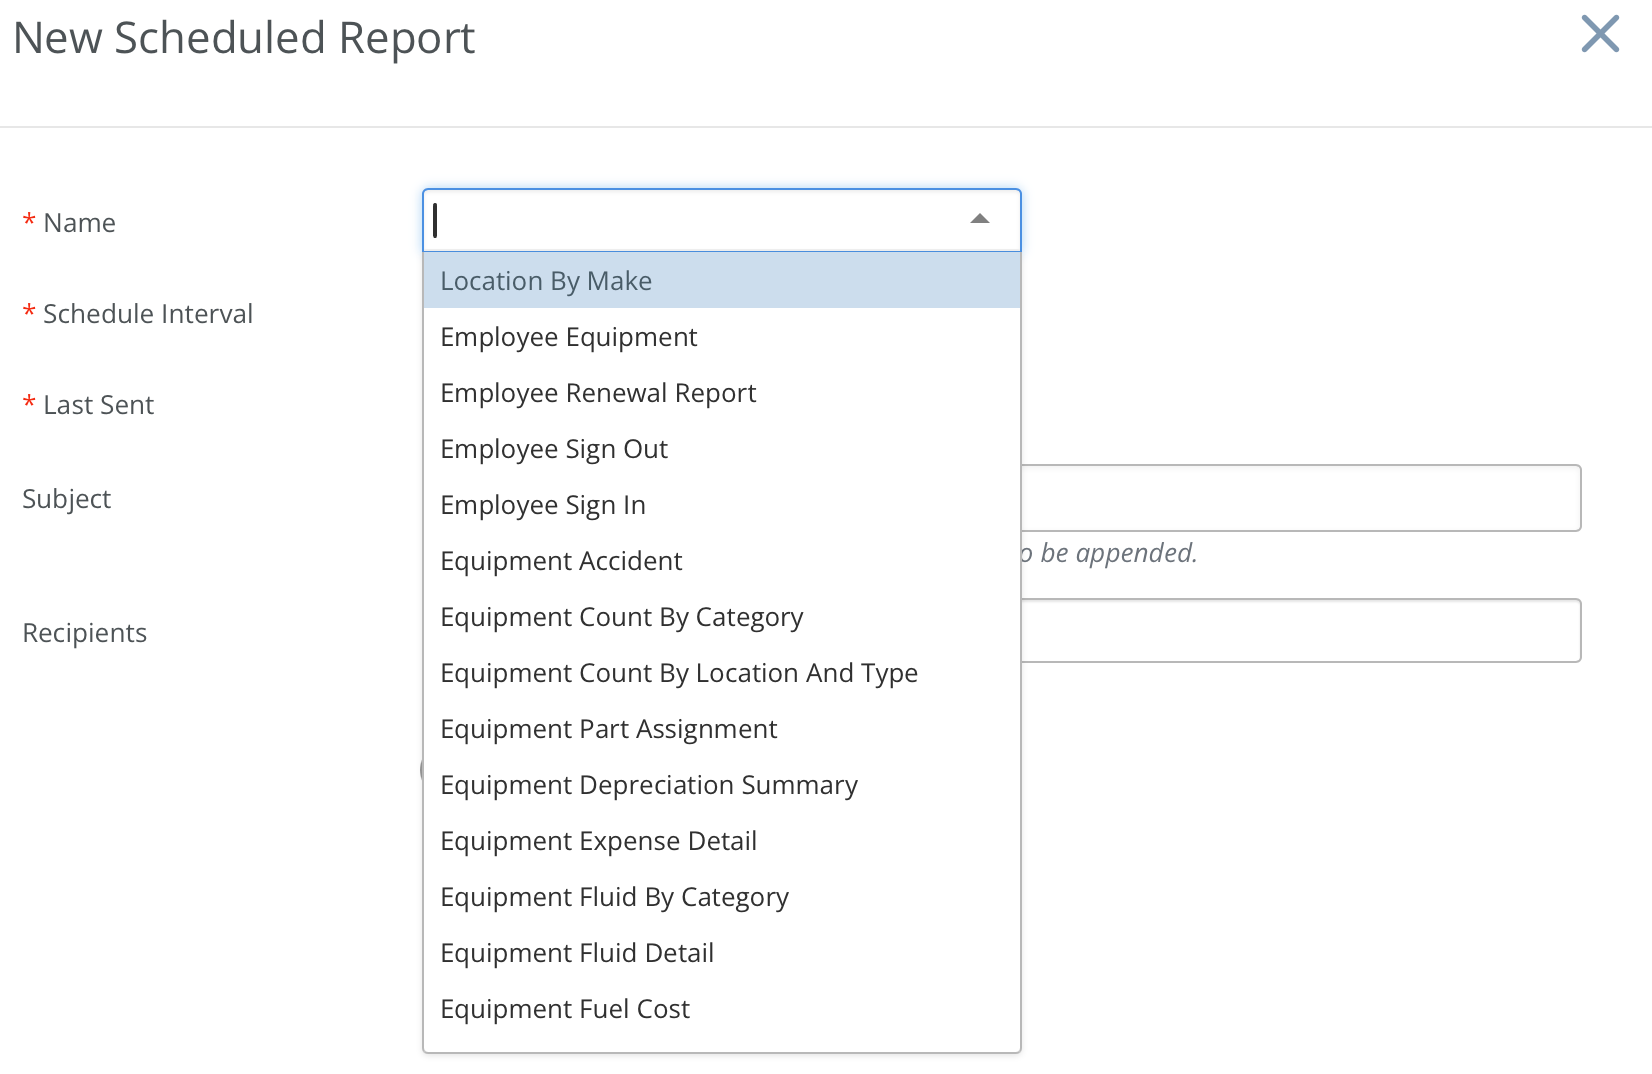
On the New Scheduled Report screen, select the desired report name from the first dropdown menu.
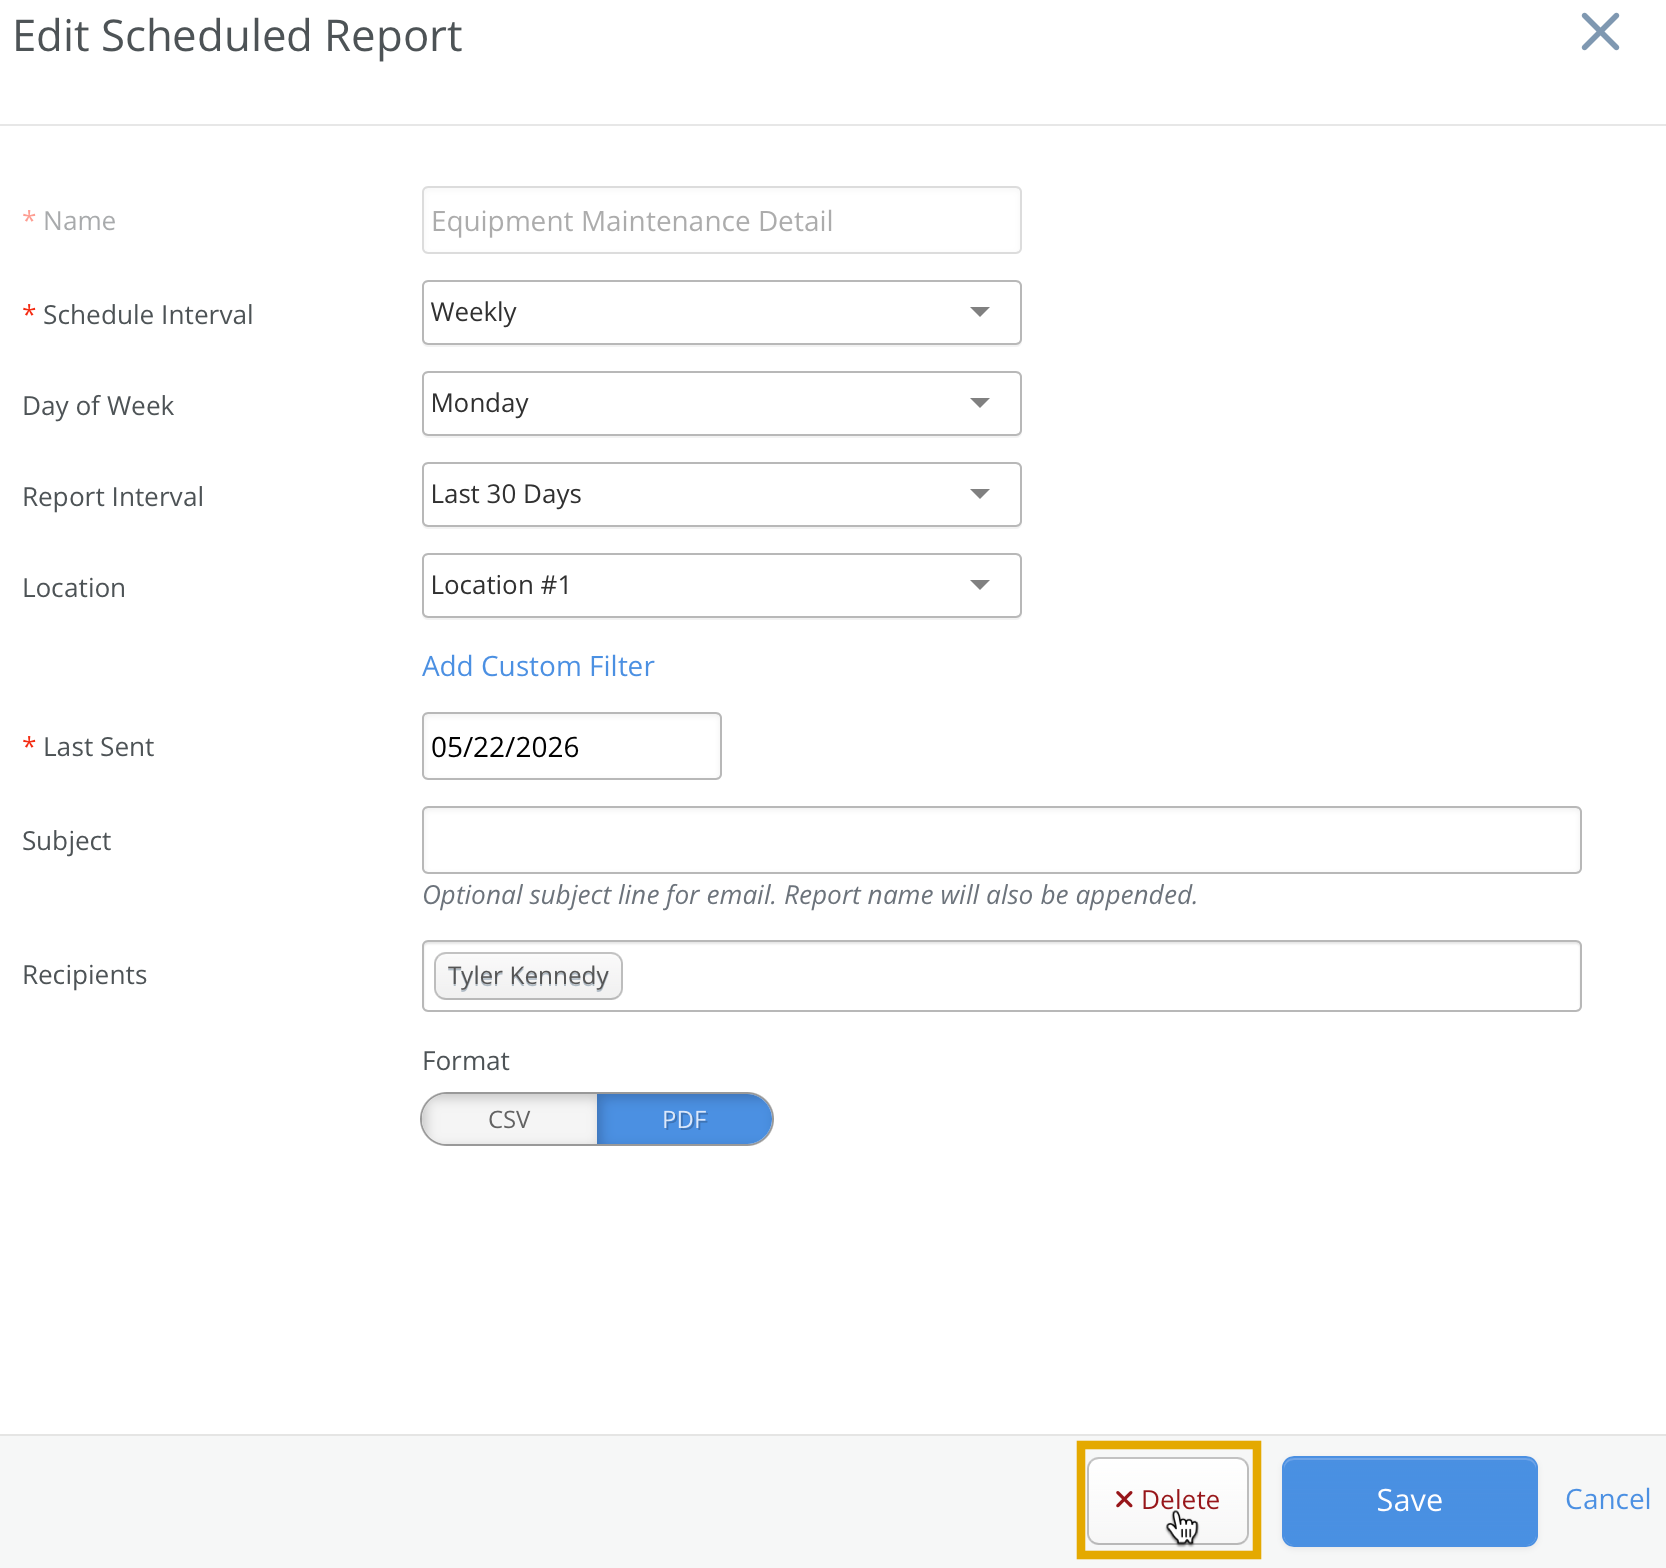
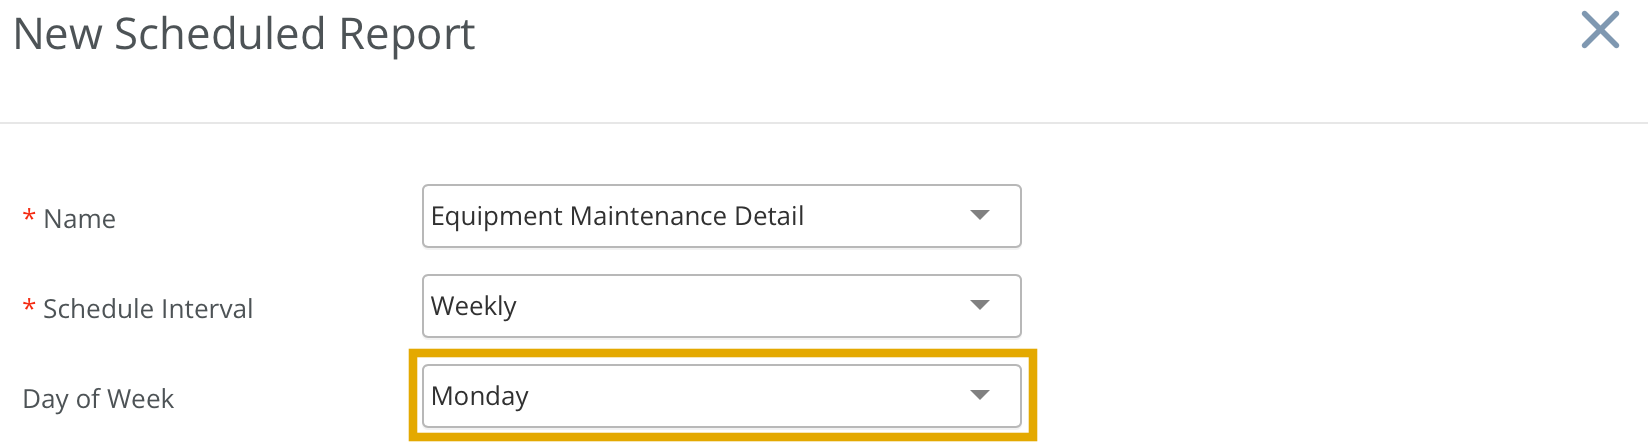
When Weekly is selected as the Schedule Interval, the system prompts for the preferred day of the week to send the report.
If a report supports a Date Range filter, a Report Interval box appears below. This option is not available for all reports. For example, the Maintenance Detail report allows a date range to be applied to view tasks completed within a specific time period.
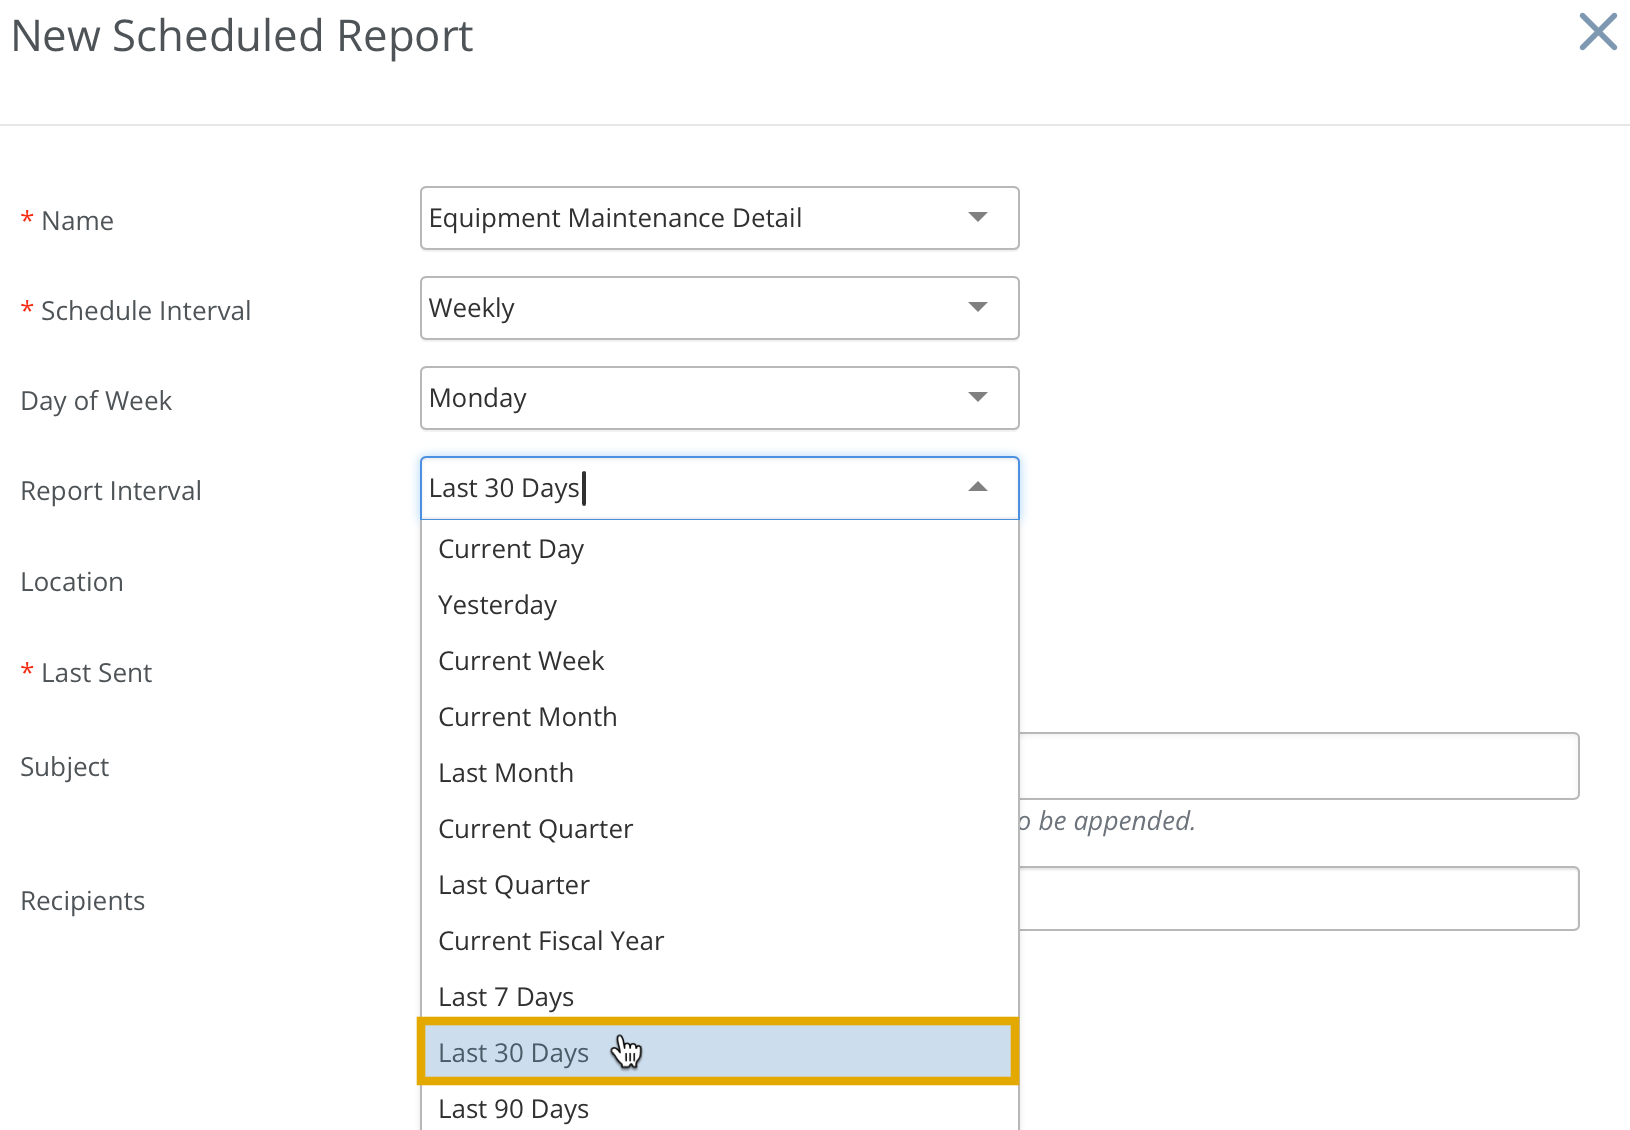
Selecting Last 30 Days ensures that each generated report includes maintenance tasks completed during the previous 30 days. A Location filter can also be applied to limit the report to equipment from a specific site.

The Last Sent value determines when the system schedules the next report email. This is typically set to the current date so the schedule begins from today, though it can be backdated if needed.
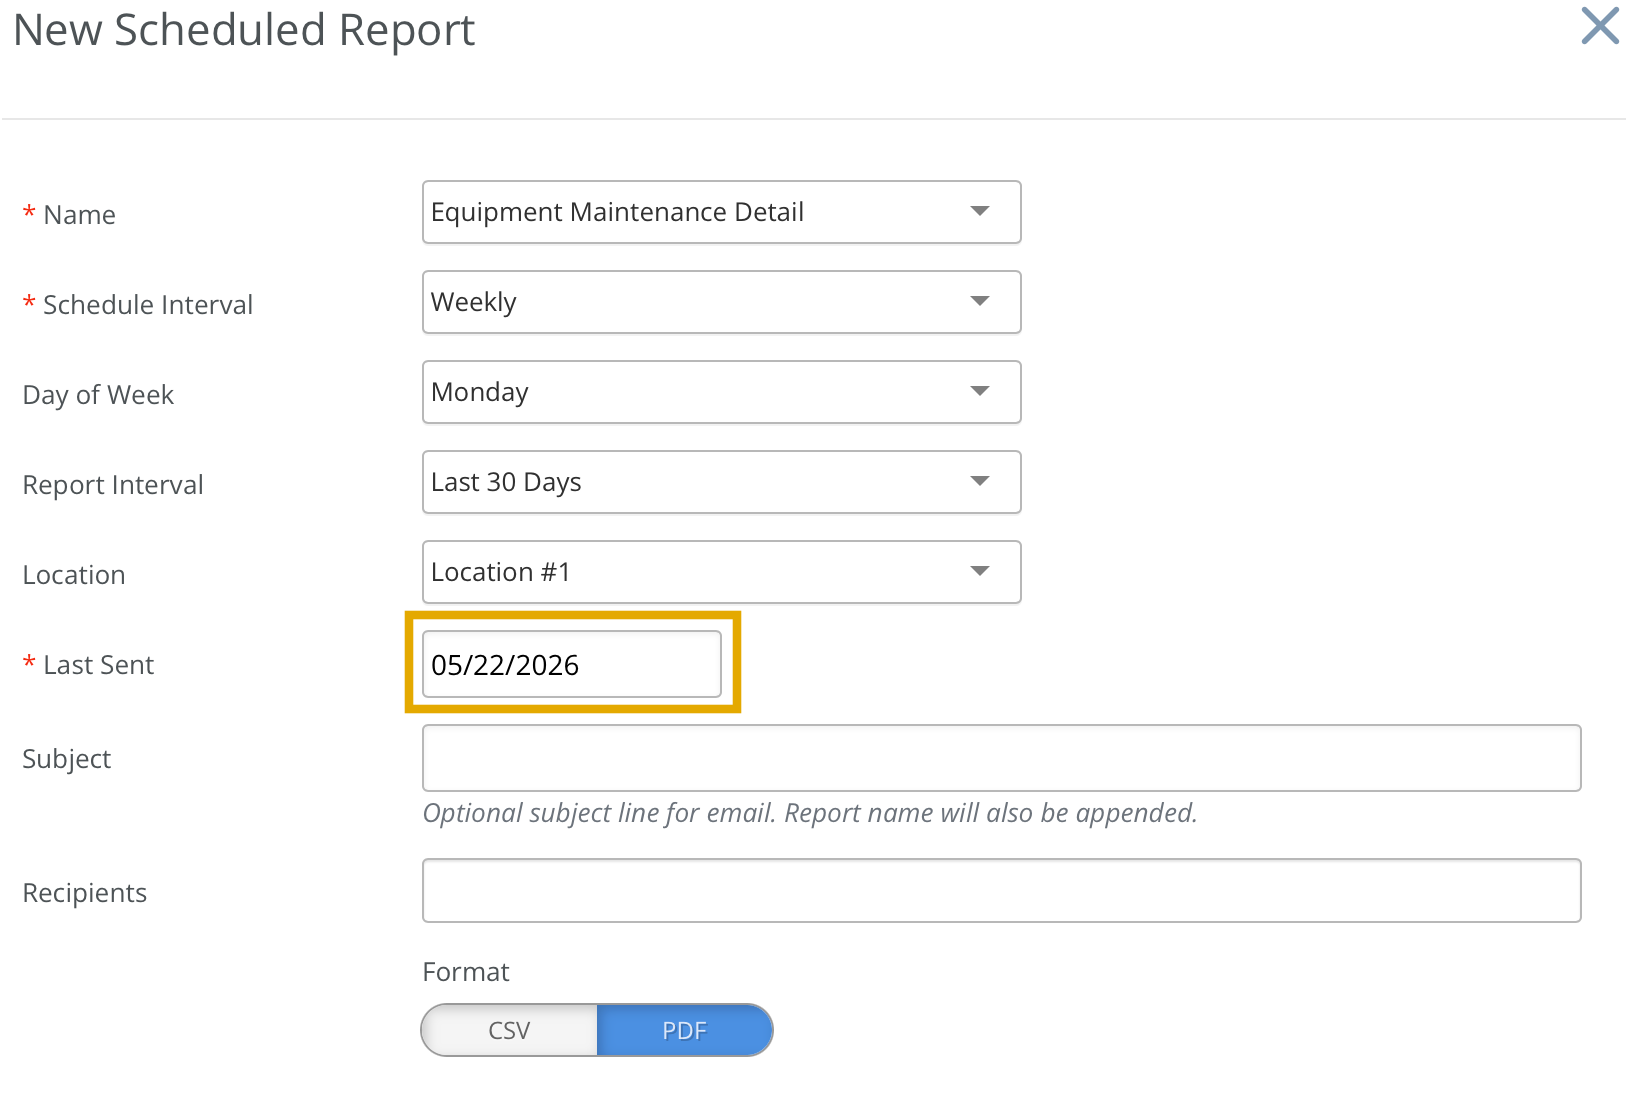
Recipients for the report can be selected in the Recipients box. Only employees linked to a license and associated with an email address are eligible to receive the report. Emails cannot be sent to employees who are not attached to a license. Multiple recipients can be specified for a single scheduled report.
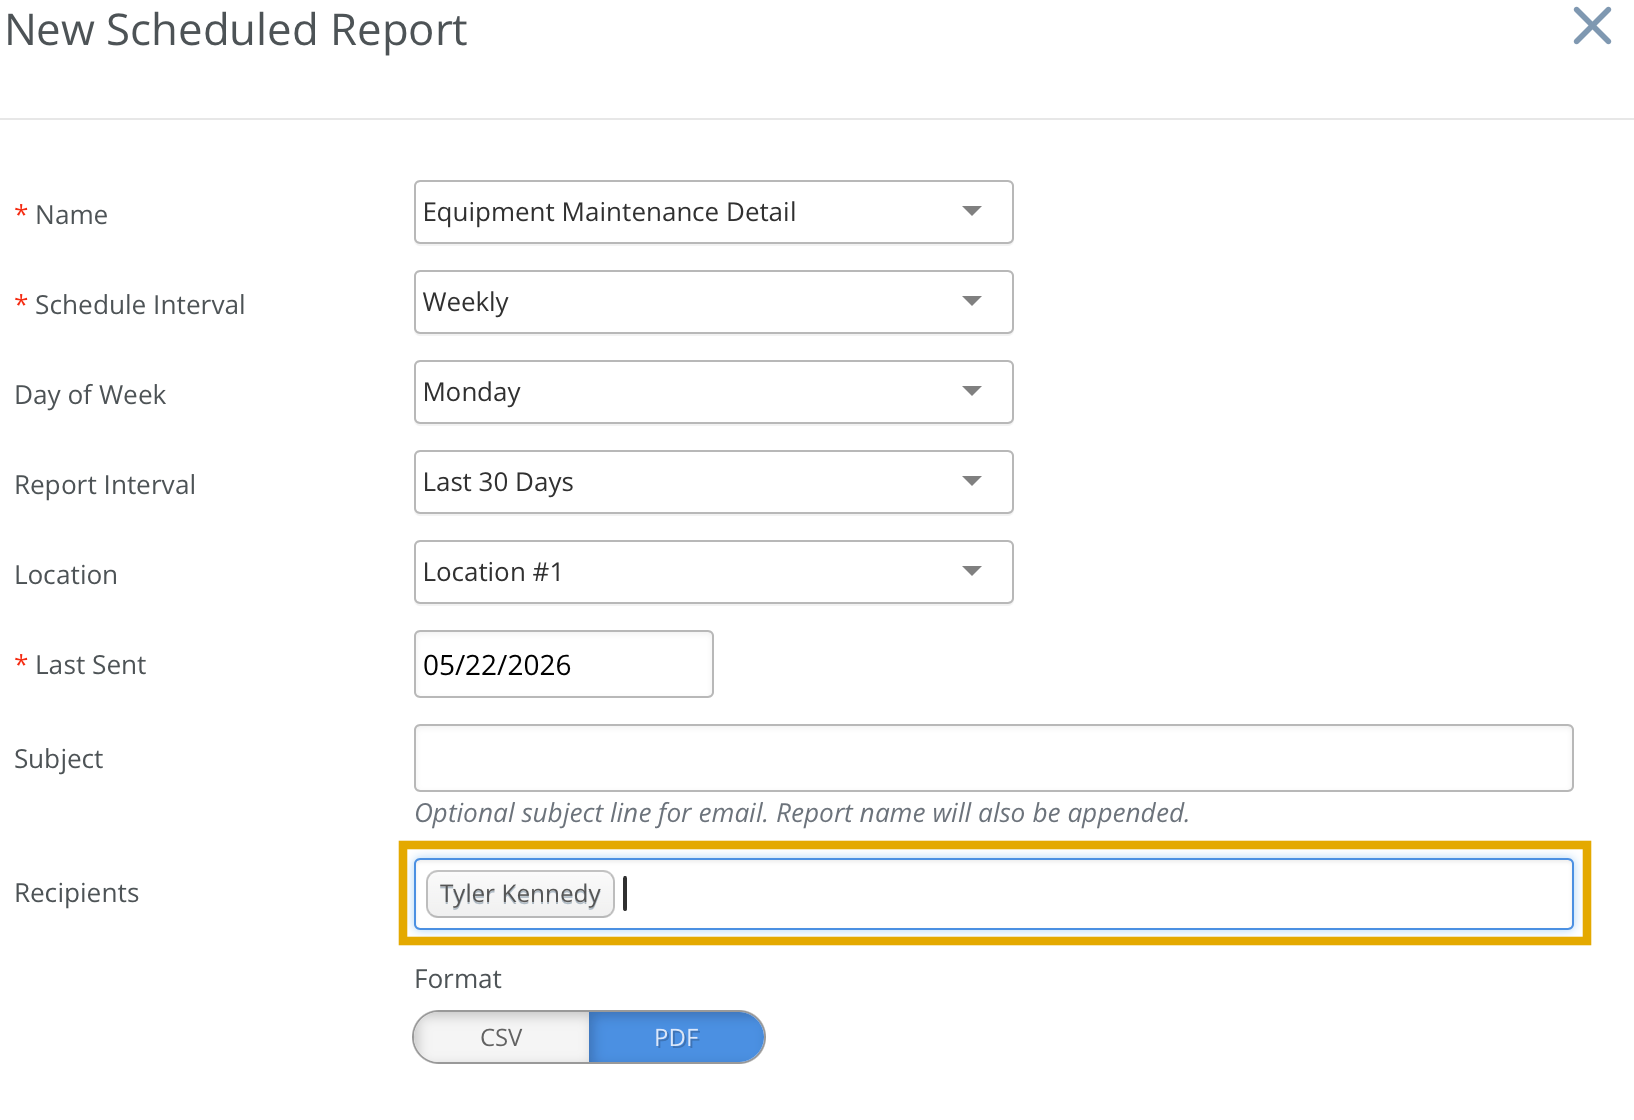
Reports are emailed in PDF format by default. To receive the report in CSV format instead, select the CSV File checkbox at the bottom. Click Save to complete the setup.
Manage Scheduled Reports
To review the list of scheduled reports, click the company name in the top-right corner and select Scheduled Reports.
Select a scheduled report name to make changes.
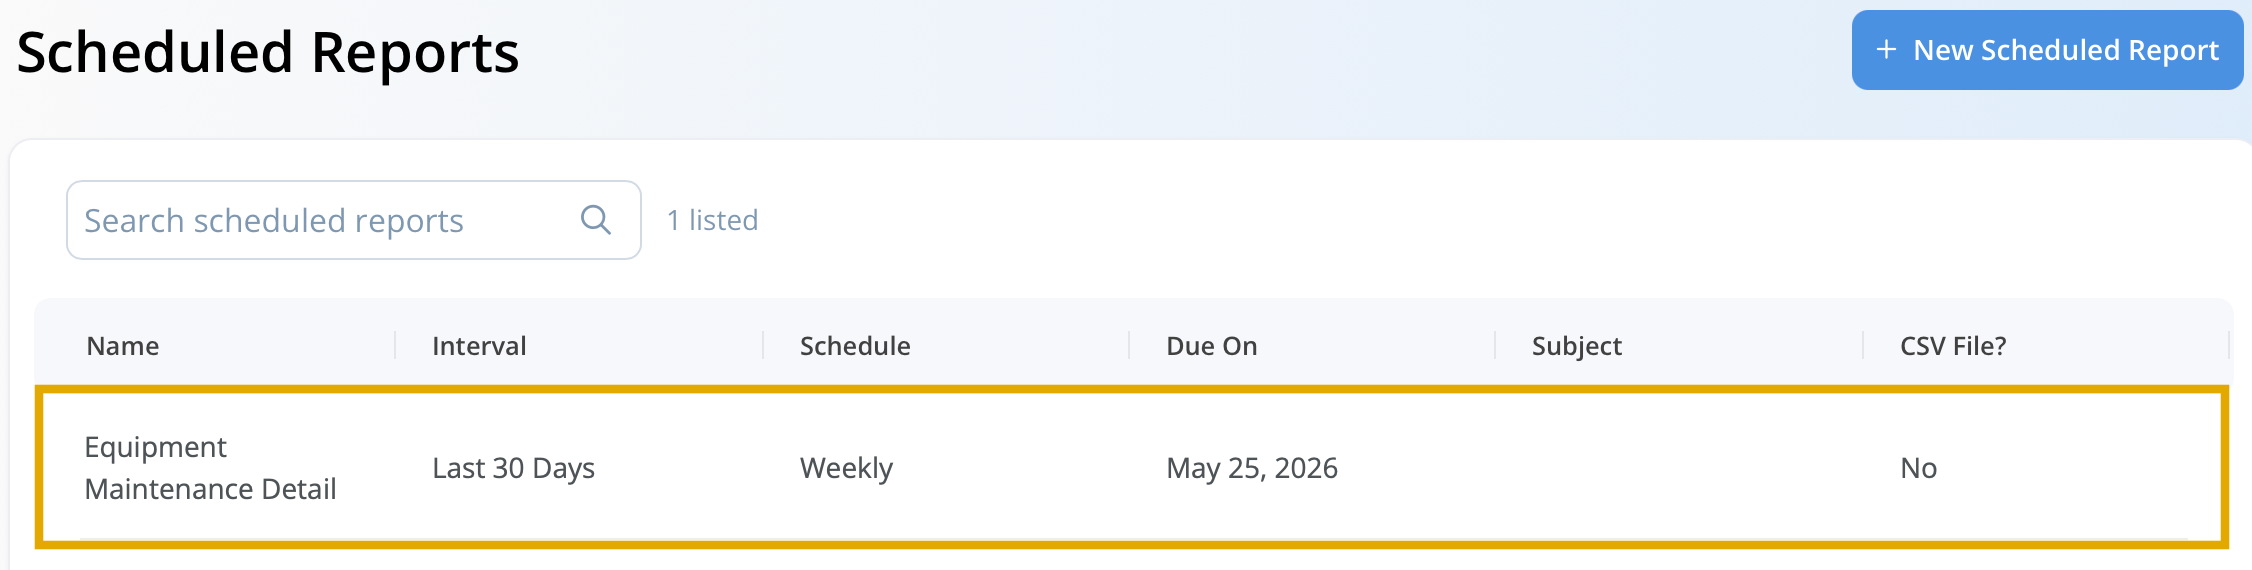
To permanently remove a scheduled report from the system, click the red Delete button at the bottom of the Edit Scheduled Report screen.