Equipment Locations
Each piece of equipment in Maintenance Pro is assigned to a Location, which helps organize equipment by grouping items according to their physical or operational site. Additionally, each Location can contain subcategories to allow for more detailed organization.
To view Locations from the Equipment Index screen, click the button located to the left of the Equipment heading in the top-left corner.
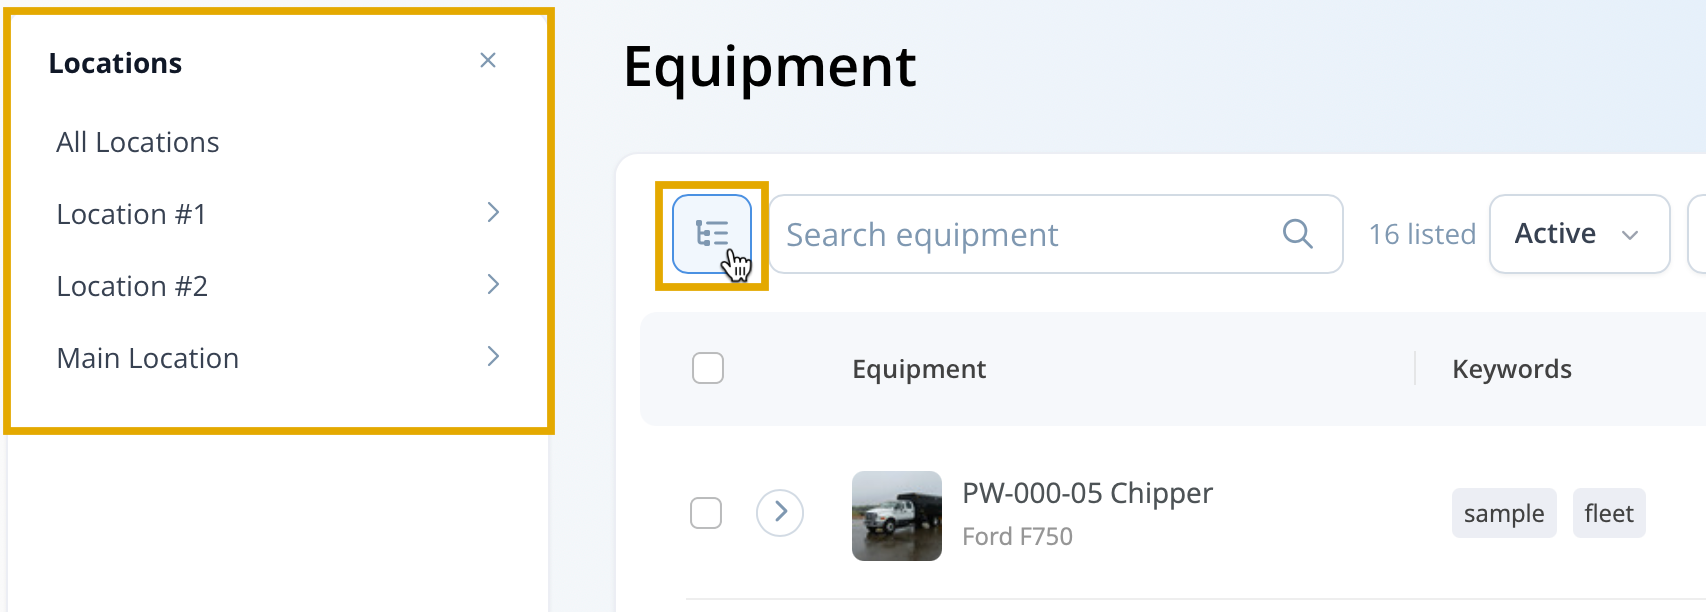
This will display the list of Locations on the left side of the screen.
Adding & Modifying Locations
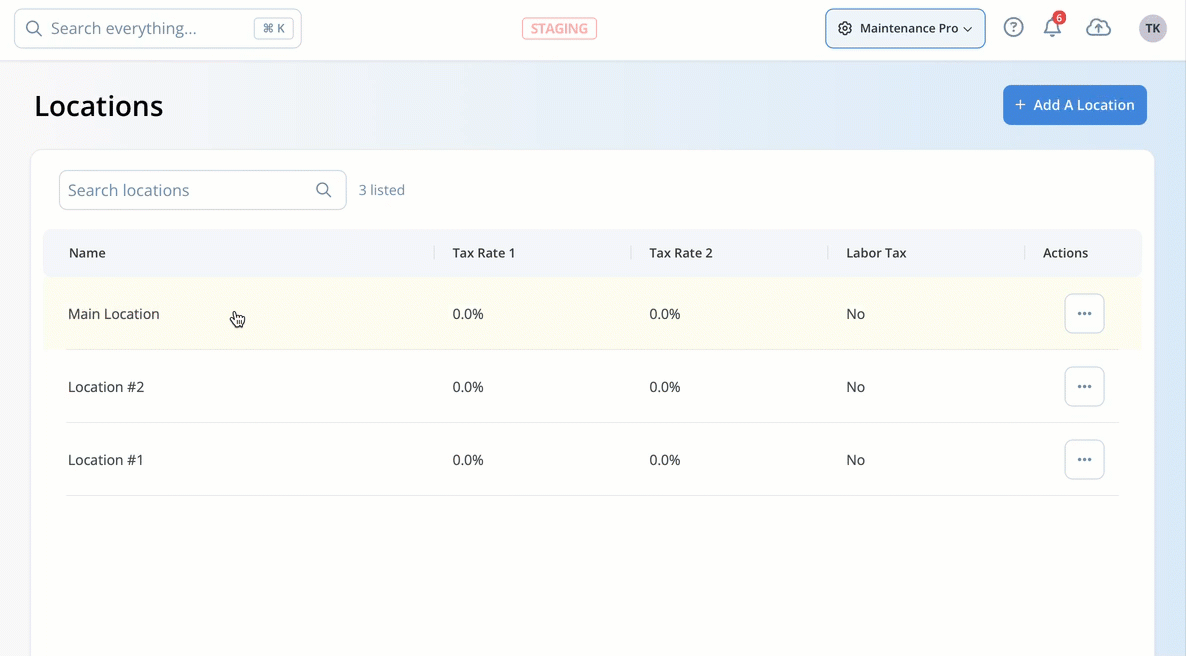
In the top right, click the Company Settings button and select Locations.
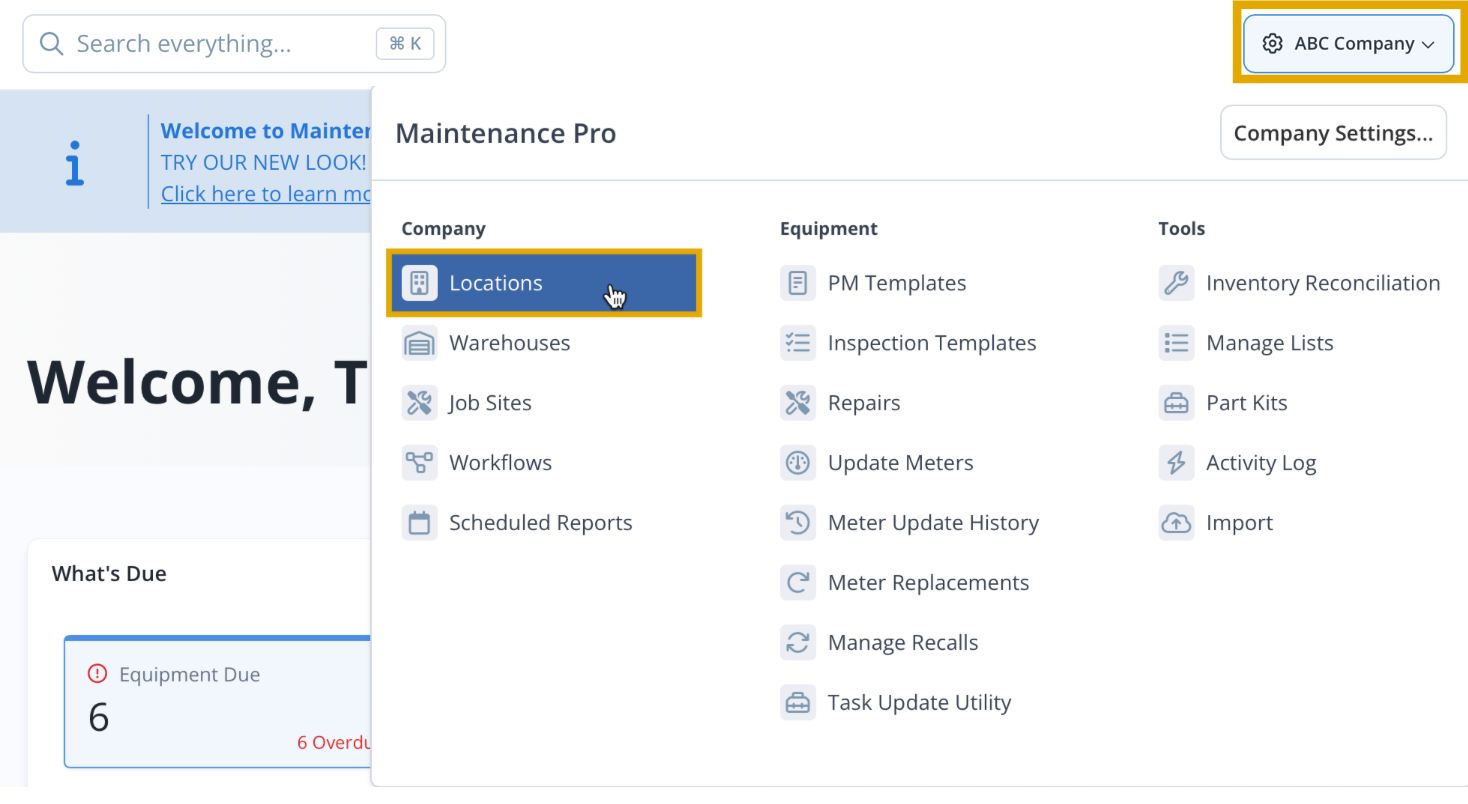
This opens the list of Locations currently configured for the organization.
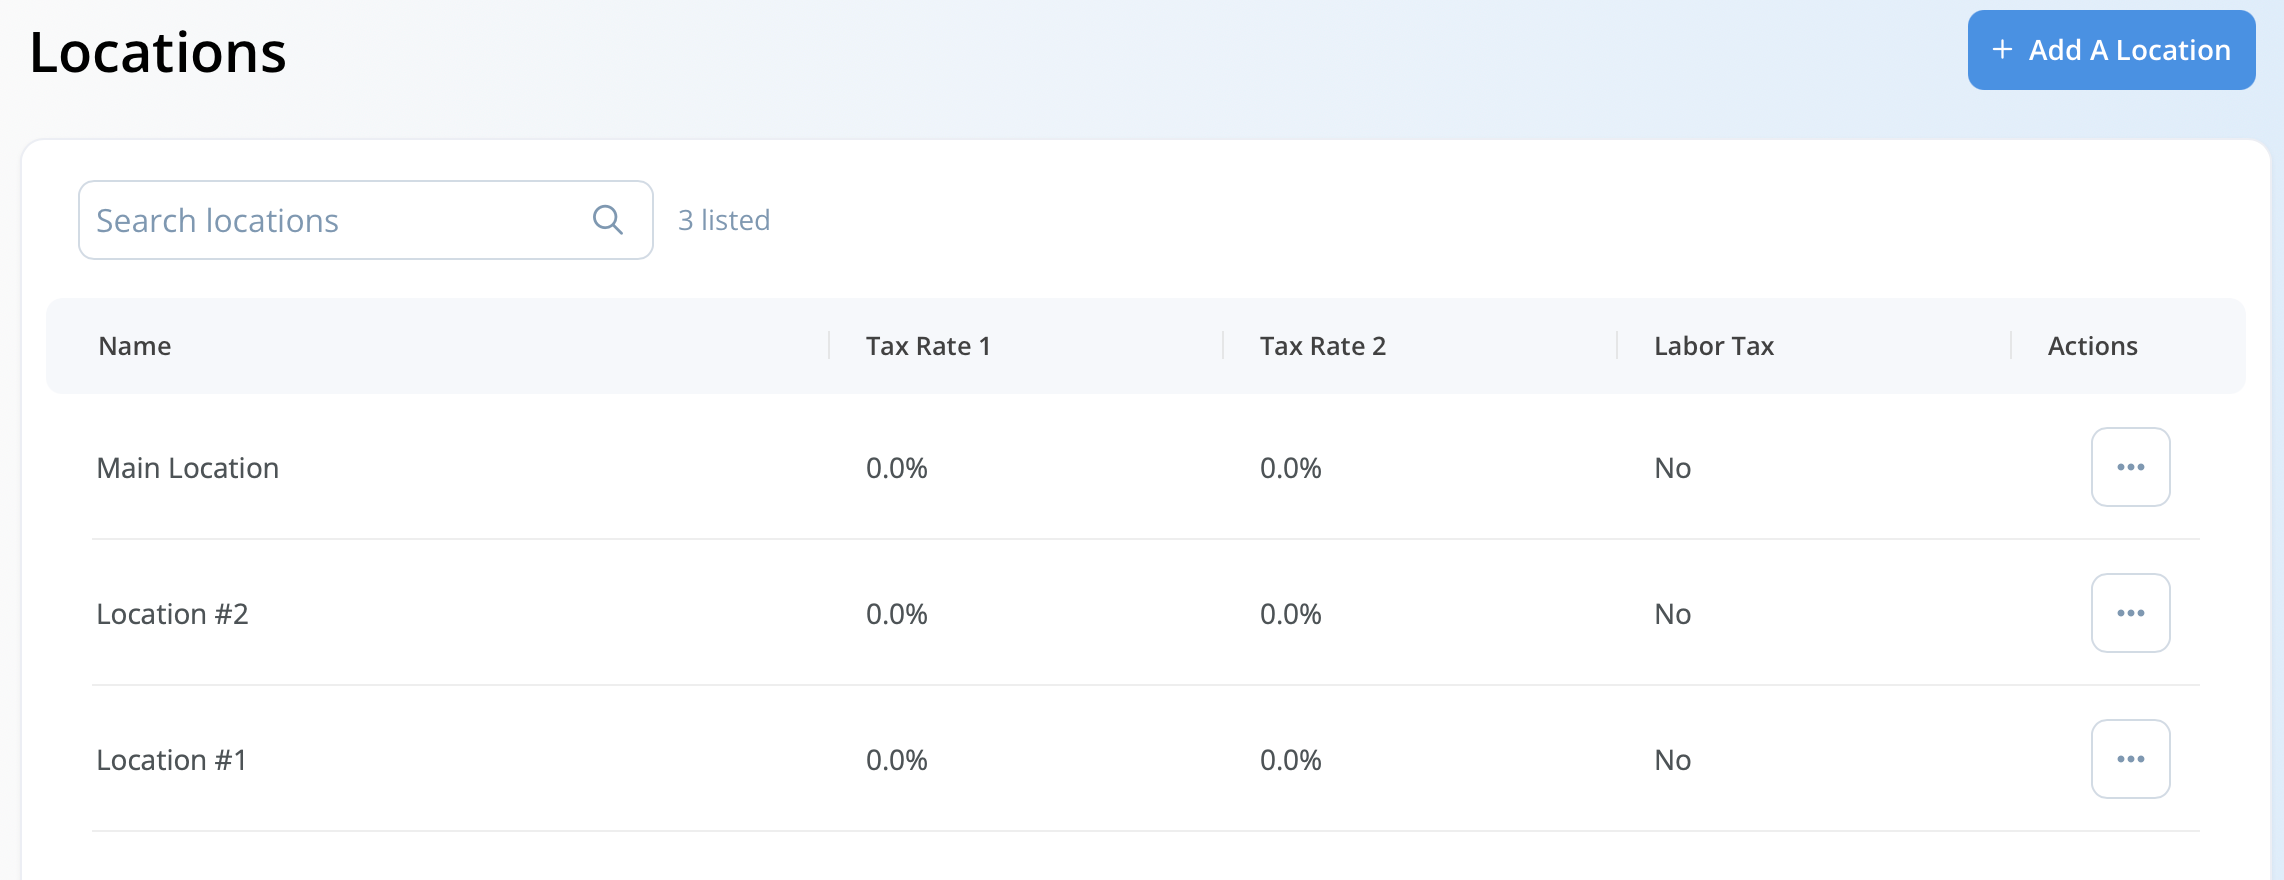
To add a new Location, click Add A Location button in the top-right corner. This will open the New Location window.
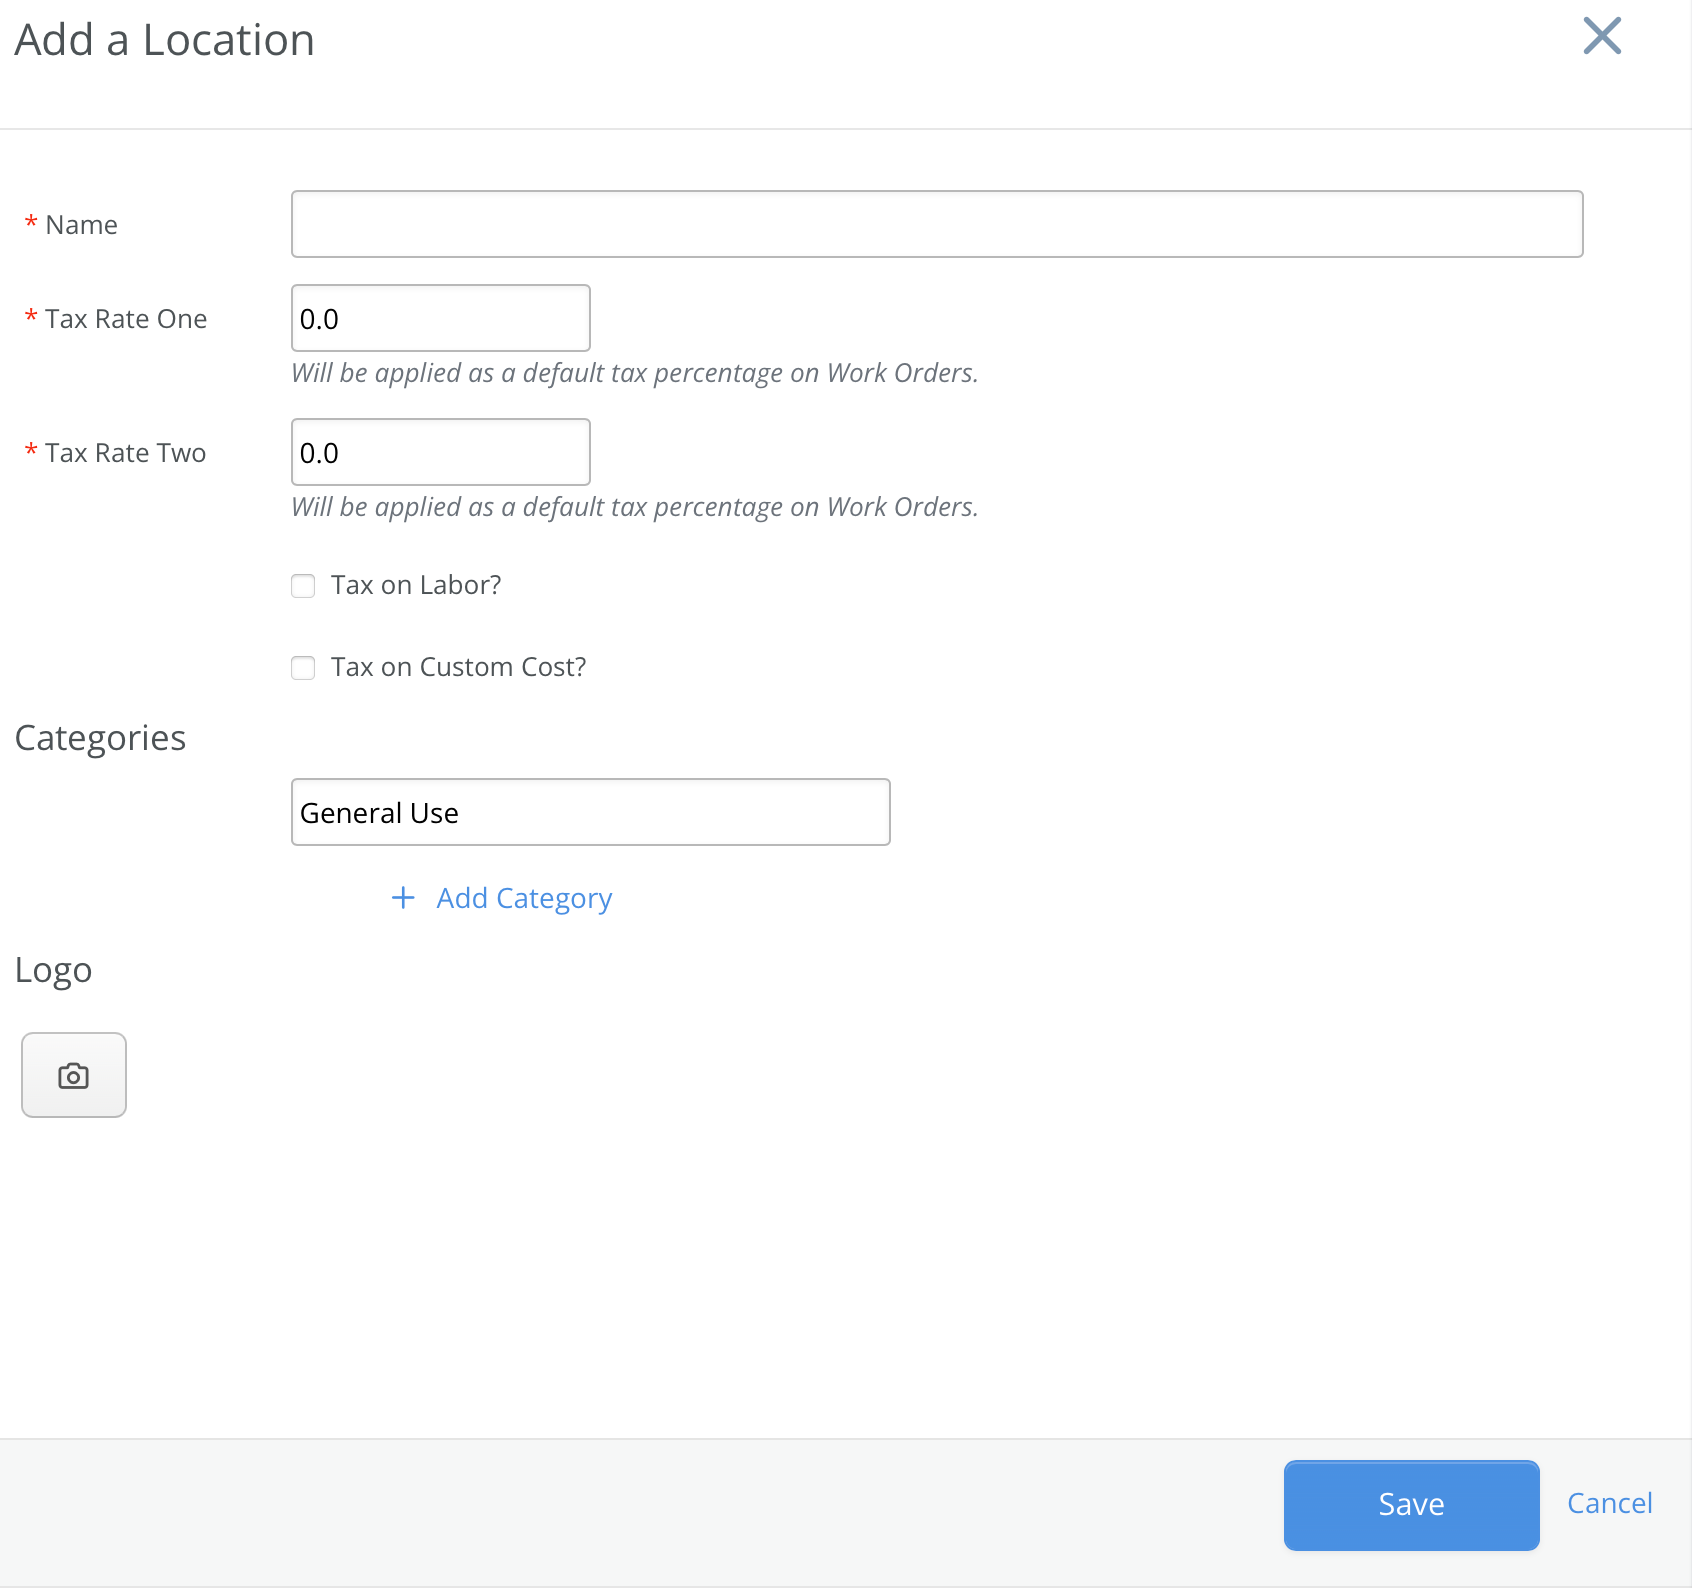
Any Location name can be added
Tax Rates set here are automatically applied to new Work Orders for units assigned to this Location. Each Location can have its own independent tax rates.
If the Tax on labor option is checked, taxes will apply to both parts and labor on Work Orders. Leave it unchecked to exclude labor from taxation.
The Categories section enables the creation of subcategories for equipment within the Location. Click Categories (with the arrow) to add or remove subcategories.
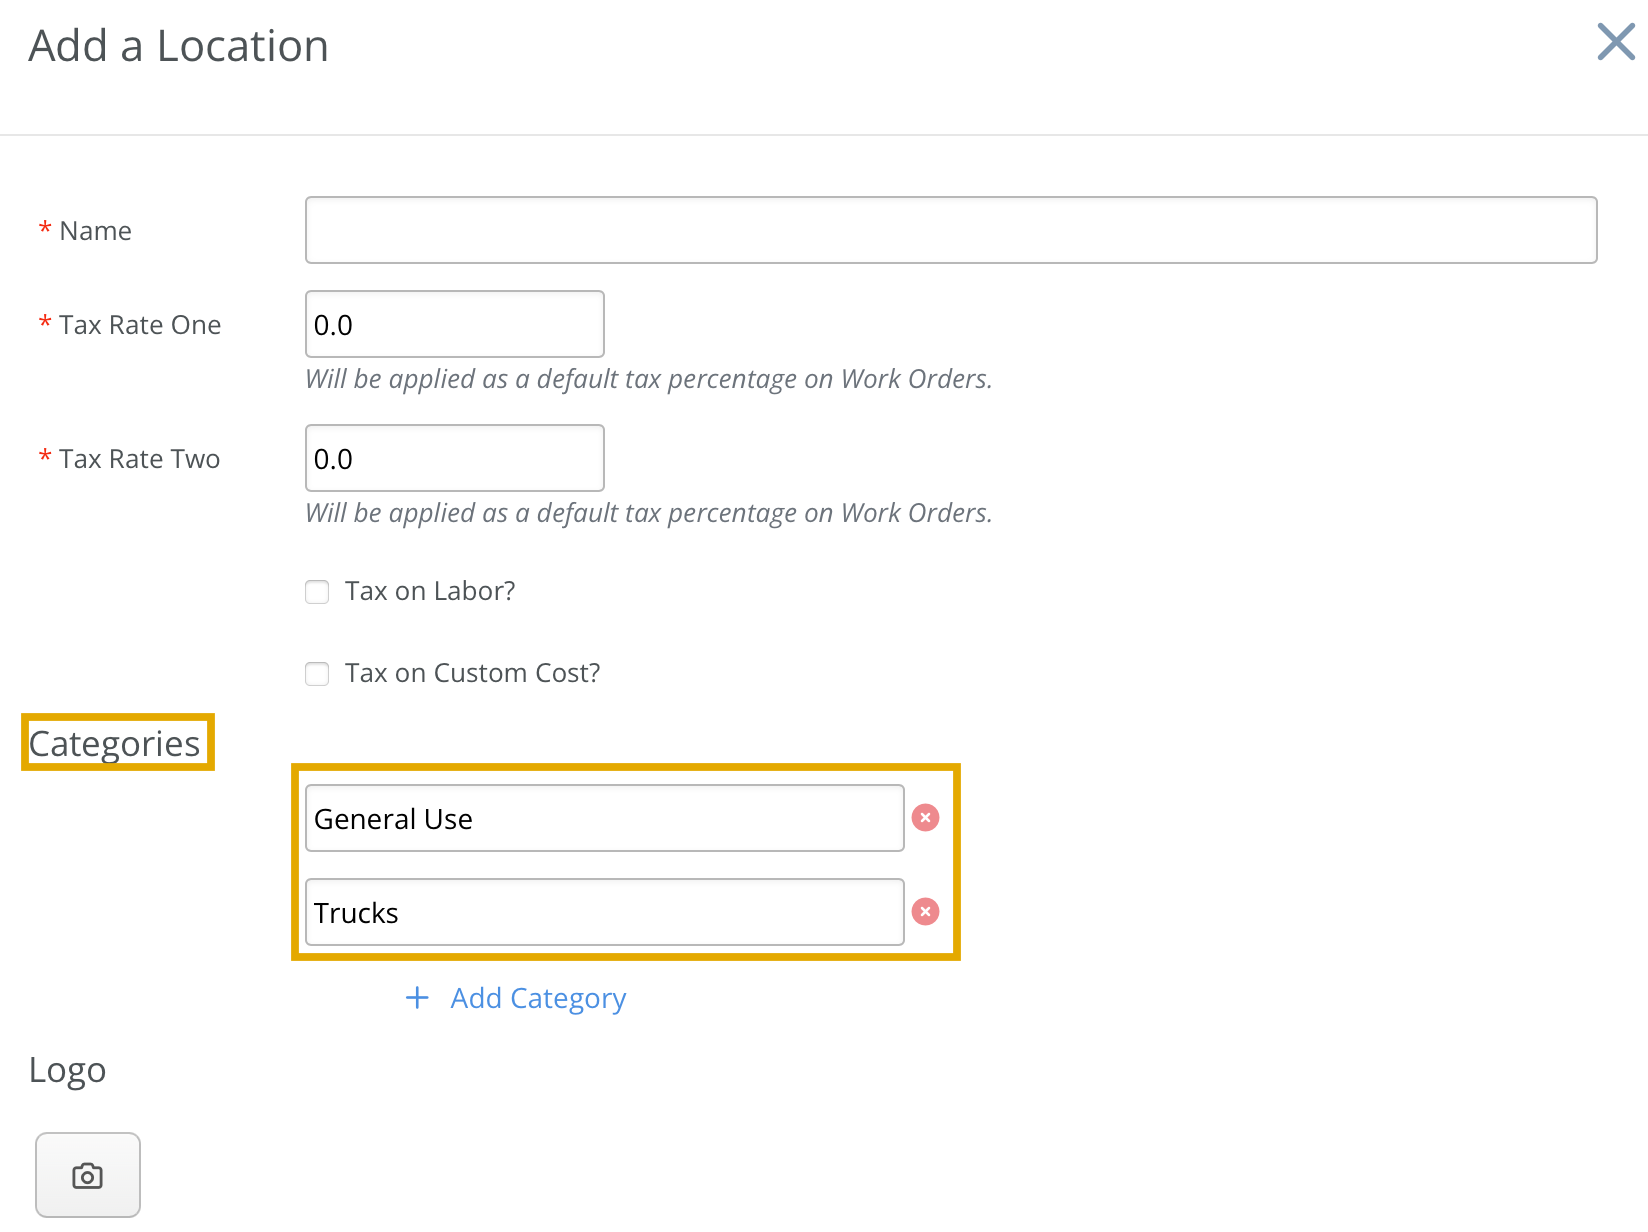
Categories provide an effective method for organizing equipment within a location.
To edit an existing location, select its row on the main Locations screen.
Deleting Locations
To delete a location, select its name from the list, then choose the Delete option.

If the location contains equipment, a message will appear instead of the Delete button.

To remove the equipment from the system, it must first be relocated to a different location.
Assigning Locations To Equipment
When adding a new unit or editing an existing one, the Location/Category section can be found under Additional Details.
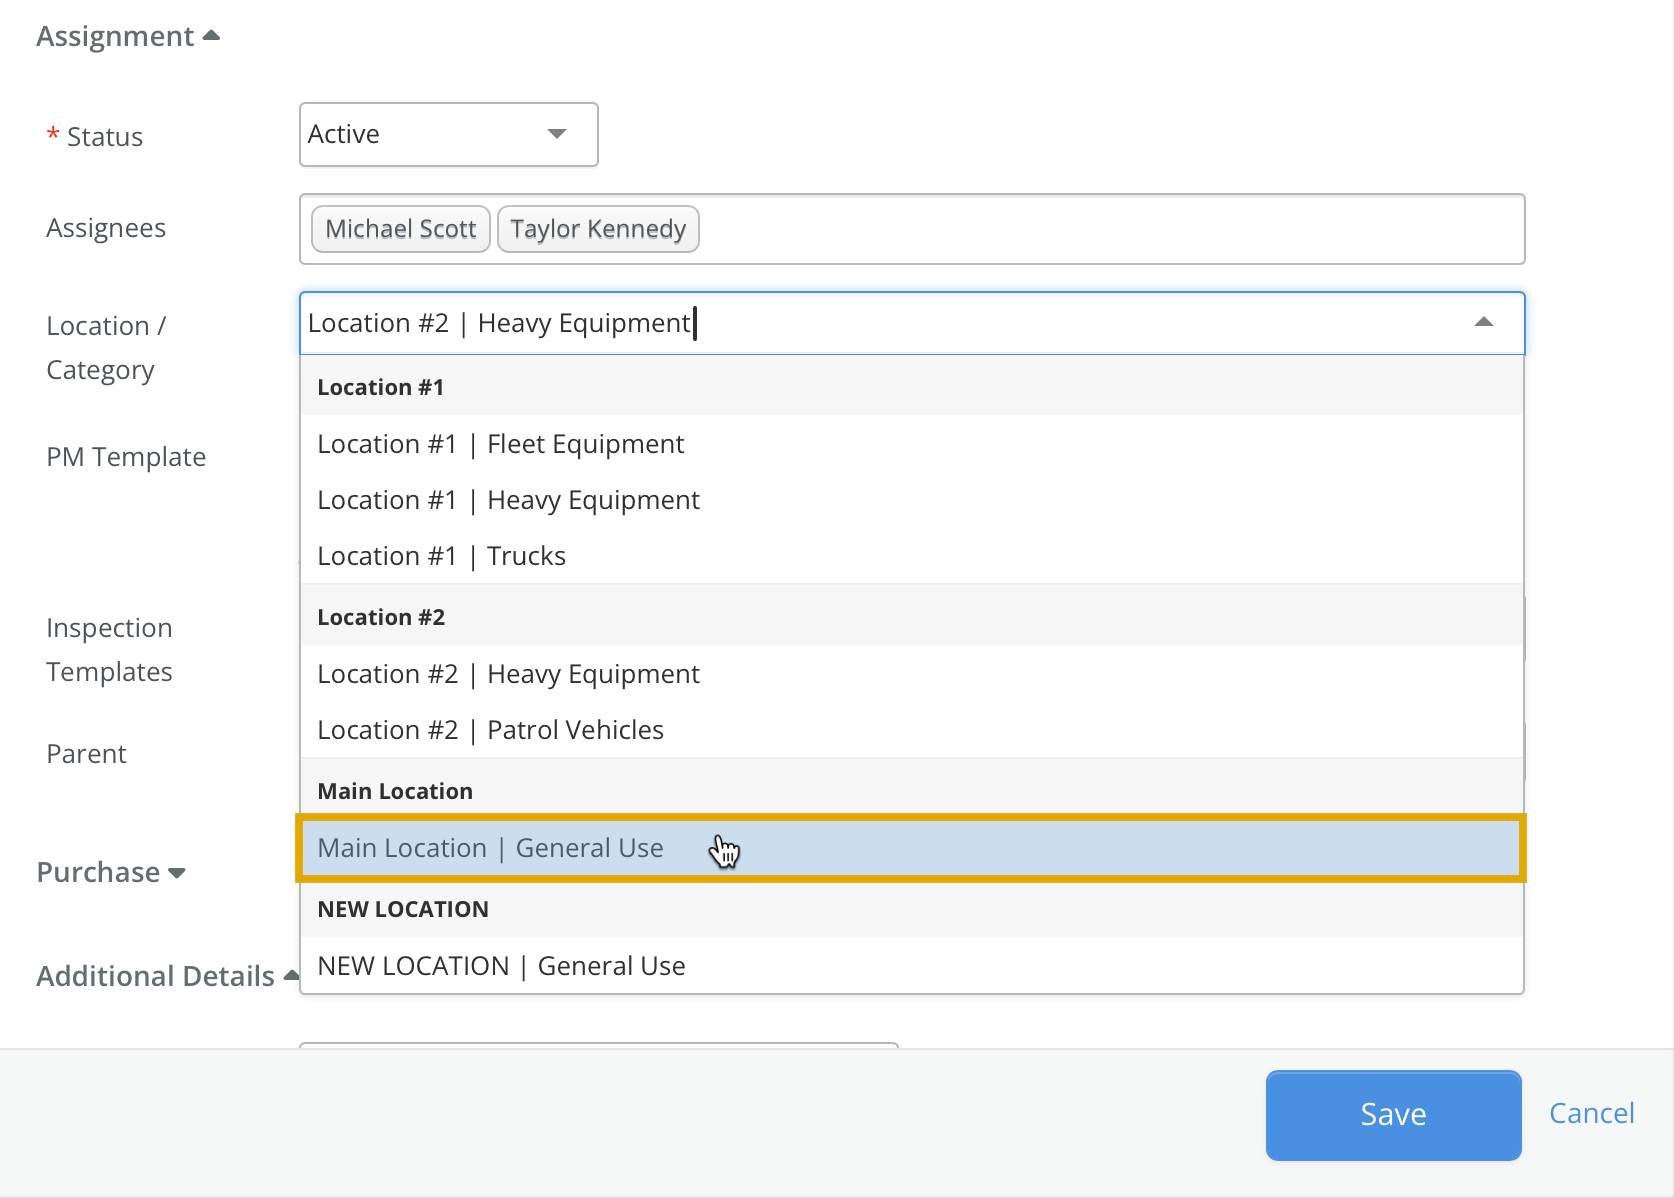
The location name appears in bold, with categories listed below in regular text. While the location name is not clickable, subcategories within the location can be selected.
Using Location Filters On Equipment Index
On the Equipment Index, equipment can be filtered by location in multiple ways. Beneath the bold Equipment heading, a location can be selected to display only units associated with that location.

Equipment can also be filtered by selecting a location name in the left-hand sidebar. To access the sidebar, click the button with three lines next to the Equipment heading at the top.
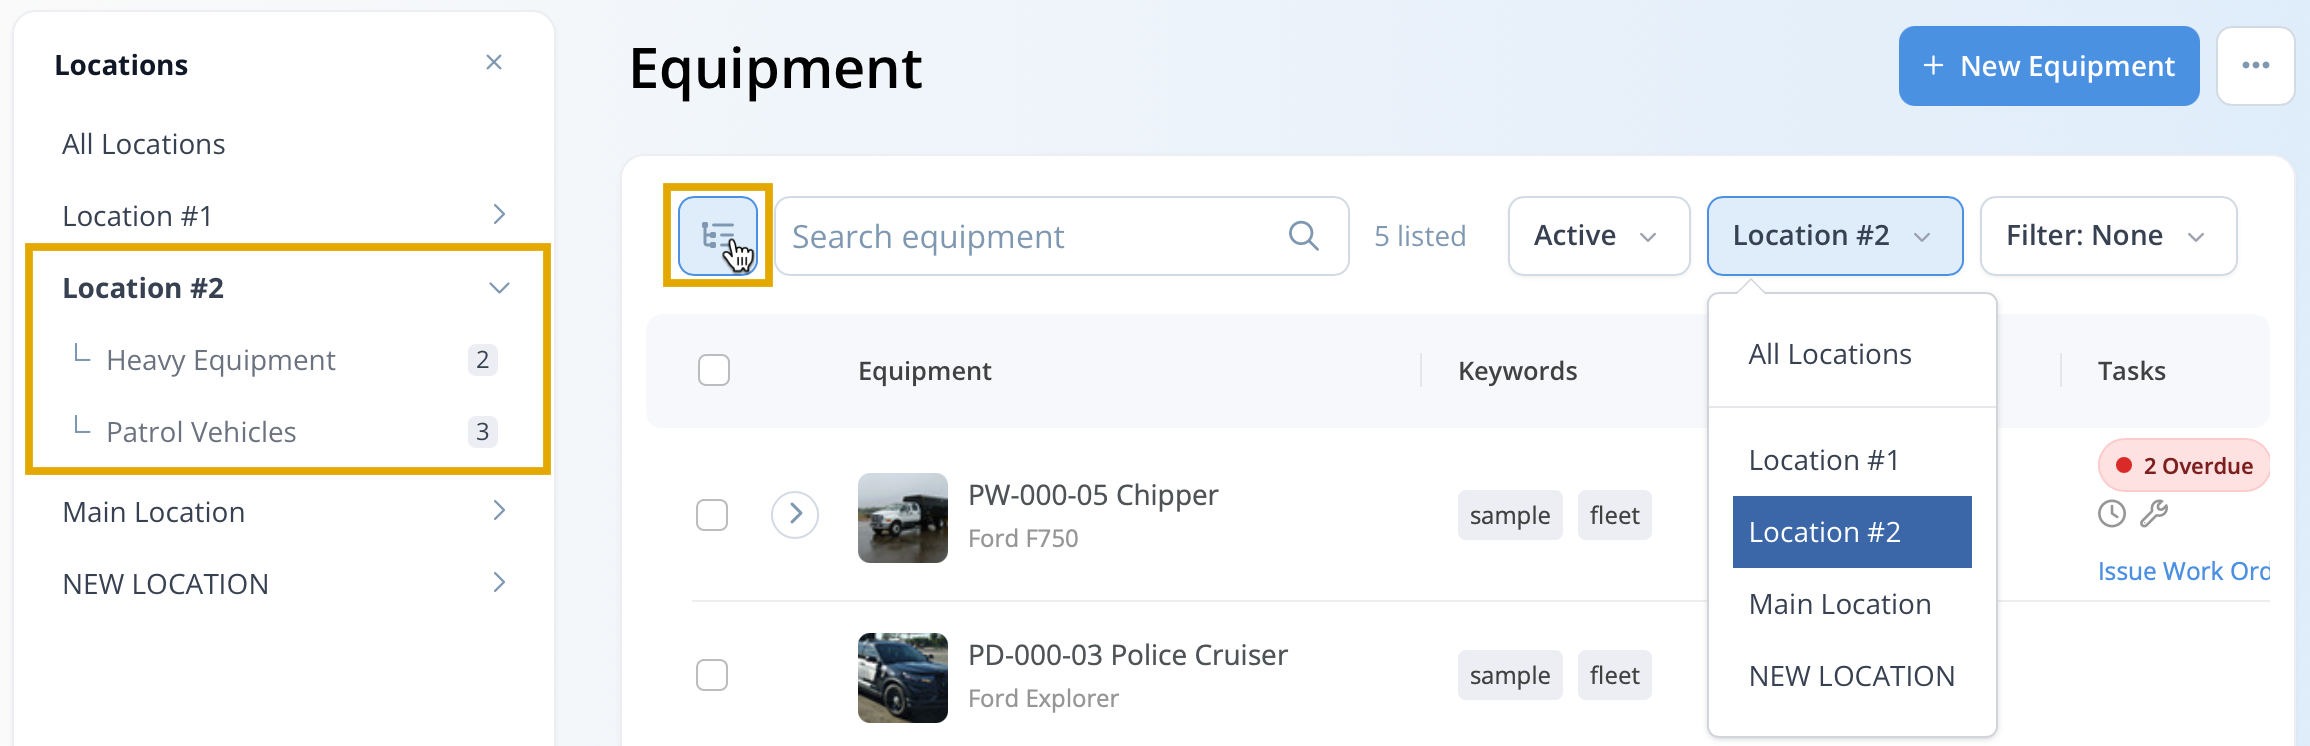
To view and filter by subcategories, click the arrow to the right of the location name.
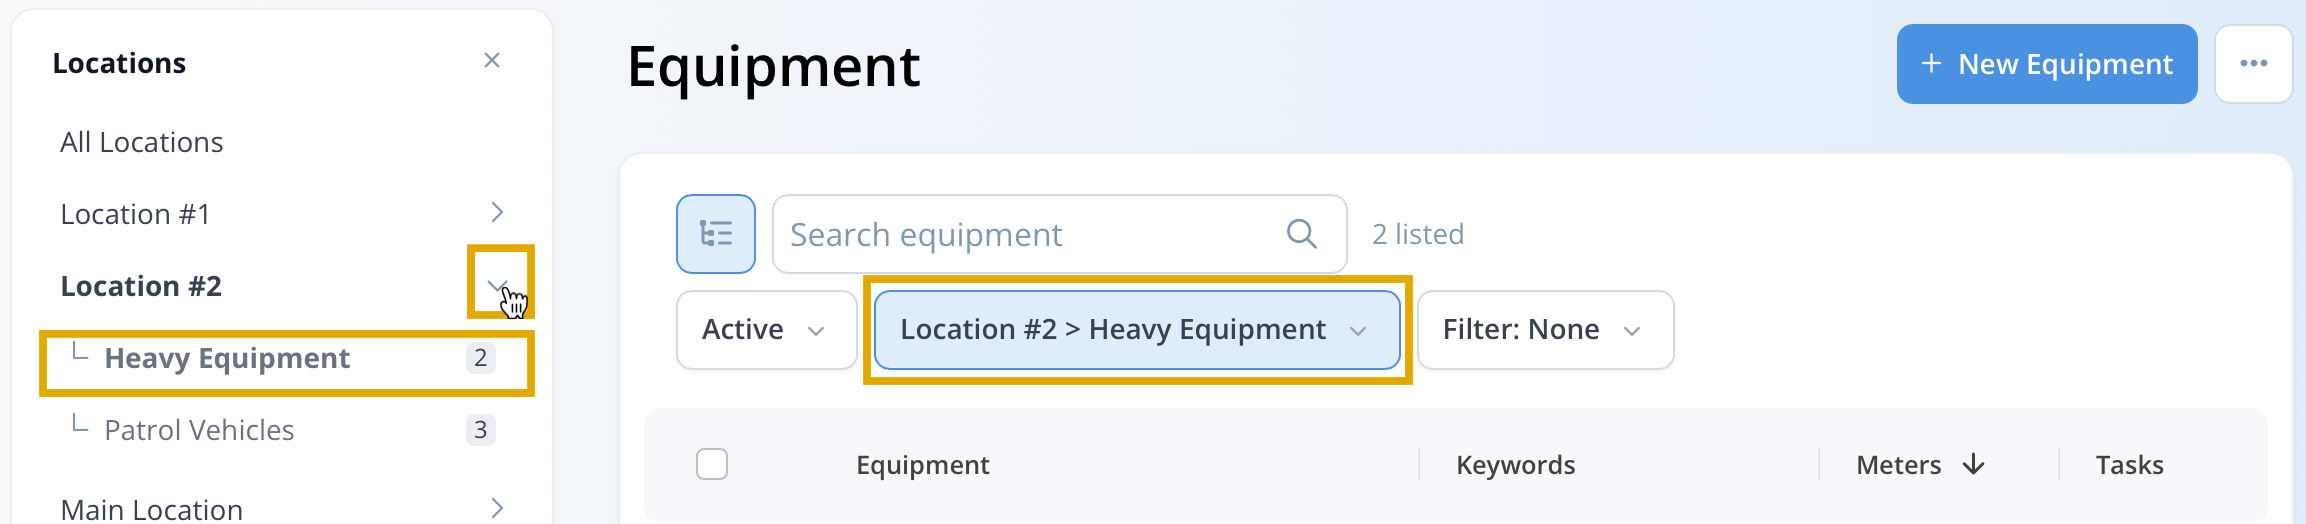
Clicking on a subcategory name will highlight it in bold. The equipment index on the right will then display only the units that belong to both the selected location and category. For example, in the image above, equipment is being viewed for the Tampa Distribution location within the Trailers category.
Note that each category on the left displays a circle with a number, indicating the total units within that category.